
How to Set Up Your Cash Drawer for Desktop POS
Overview
Setting up your cash drawer with the Desktop POS system is an essential step to ensure smooth transactions at your store. Follow the steps below to correctly install and configure your cash drawer.
Prerequisites
Before you begin, make sure you have the following:
- A compatible cash drawer
- A receipt printer is mandatory for setup
- Thermal Receipt Printer
- RJ11 or RJ12 Cable (typically comes with the cash drawer)
- Desktop POS system installed and running
- Receipt Paper
Step 1: Connect the Cash Drawer to the Receipt Printer
Cash drawers typically connect to a receipt printer, which sends an electrical signal to open the drawer. Use the provided cable to connect the cash drawer to the receipt printer's drawer kick-out port.
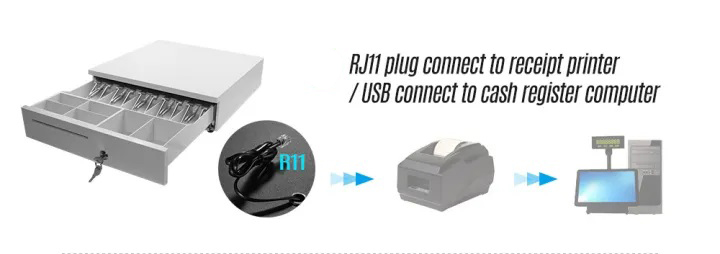
- Locate the Cash Drawer Port: On the back of your receipt printer, find the port labeled DK or Cash Drawer. This is where you'll connect the cash drawer.
- Connect the Cable: Take the RJ11 or RJ12 cable that came with your cash drawer. Insert one end into the DK port on the back of your receipt printer.
- Connect to the Cash Drawer: Insert the other end of the cable into the corresponding port on your cash drawer.


Printer Settings
- Go to Devices and Printers on Windows.
- Right-click the printer's driver and select Printer Properties.
- The properties window will appear. Click the Device Settings tab.
- Expand the Peripheral Unit Type menu and select Cash Drawer.
- Enable the Cash Select option After Printing.
- Click Apply to save.
- To test, click the General tab and Print Test Page to print a test and open the cash drawer.


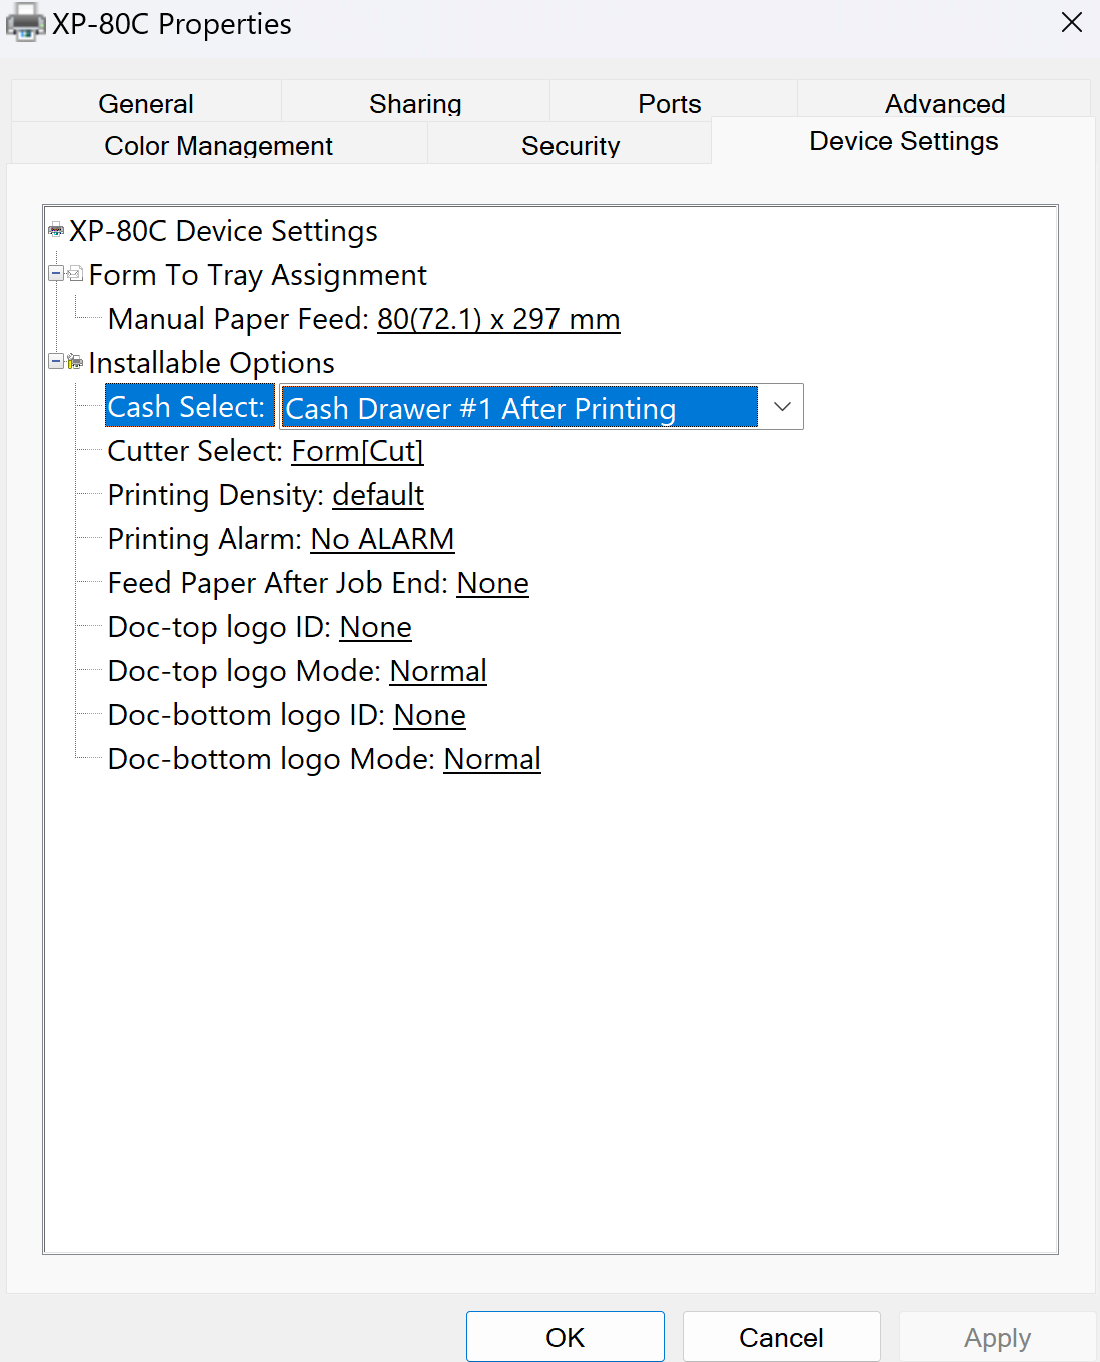
If successful, the printer will print a Windows test page and open the cash drawer following your selected configuration.