Serial Number & Warranty Management
The Serial Number & Warranty Management Plugin helps electronics stores, mobile phone shops, and appliance retailers track product serial numbers (IMEI numbers) and manage warranty claims directly from the Desktop POS.
This feature is especially useful when customers, law enforcement agencies, or security personnel need to verify whether a specific device was sold by your business.
With this plugin, you can:
- Track product serial numbers and IMEI numbers
- Search invoices using serial numbers
- View product sales history
- Manage warranty claims
- Track warranty claim status
- Maintain customer purchase records
Note: This plugin currently works only with Desktop POS.
Why Use Serial Number Tracking?
Many electronic products contain unique identifiers such as IMEI Numbers, Device Serial Numbers, and Product Identification Numbers.
Using serial tracking, businesses can quickly determine:
- Who purchased the product
- When it was sold
- Which invoice contains the item
- Whether the product is still under warranty
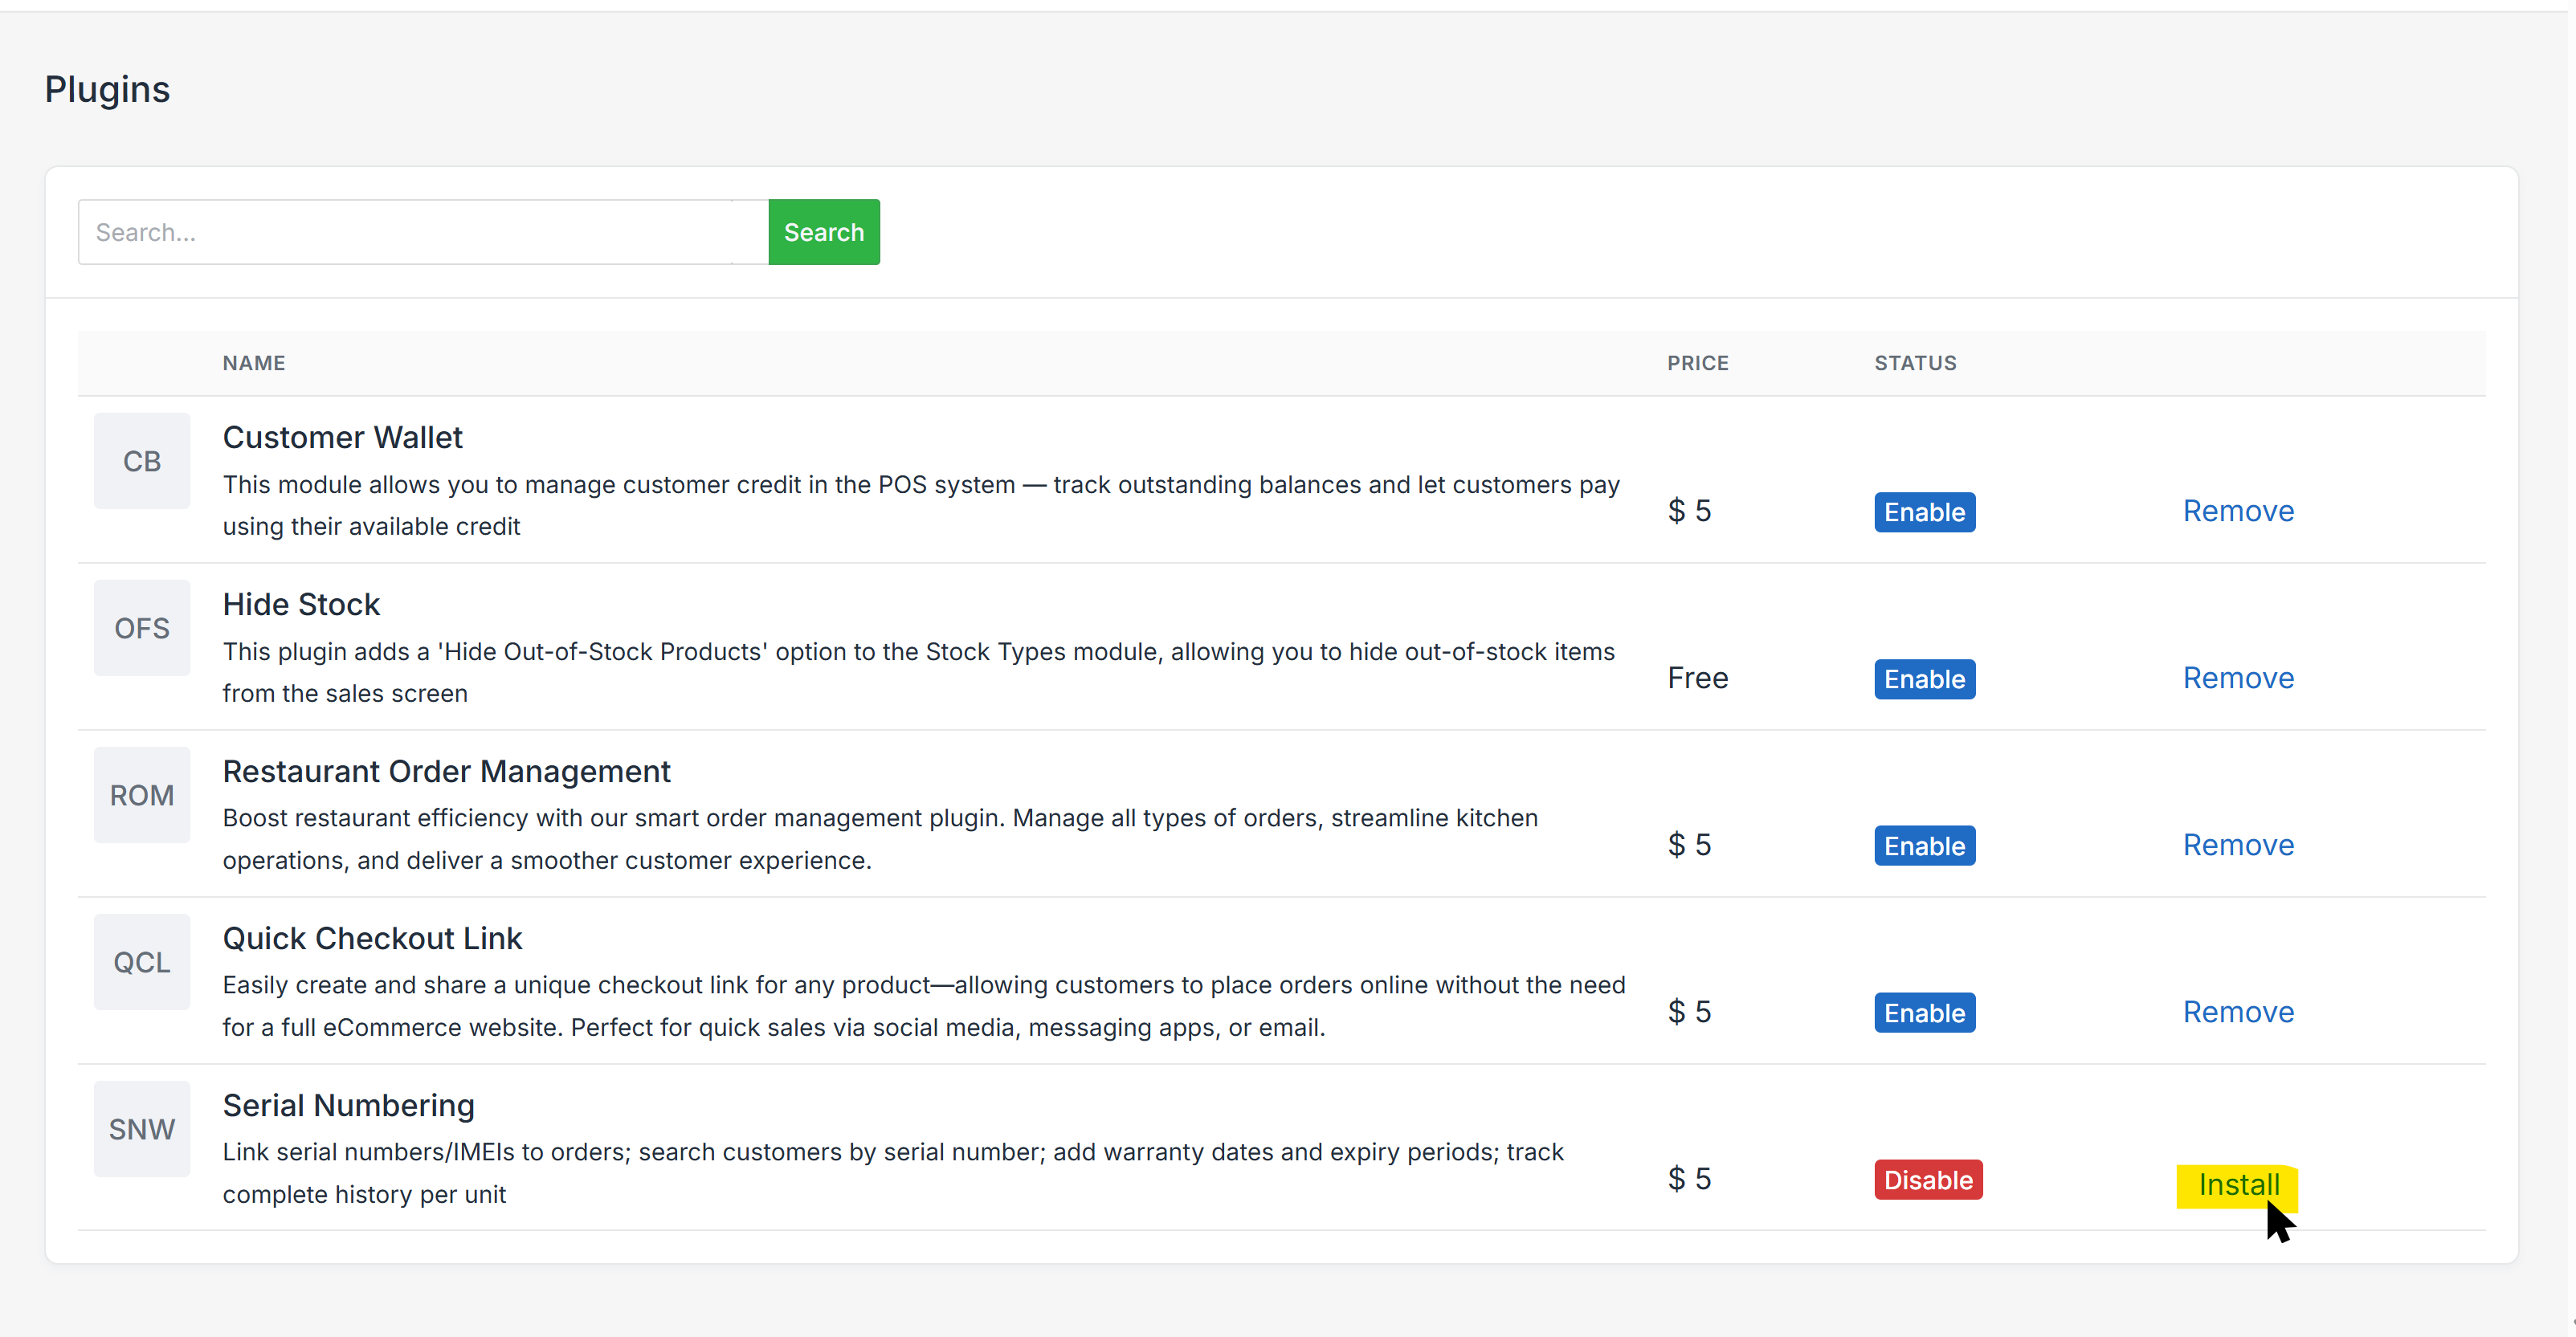
Step 1: Install the Plugin
Go to Settings → Plugins. Locate Serial Numbering and click Install.
Step 2: Enable Serial Tracking for a Product
Navigate to Menu → Items → Select Item. Scroll to the Warranty Serial Tracking section.
Enable Enable Serial Tracking. Optionally configure:
- Warranty Days
- Warranty Type
Click Save.
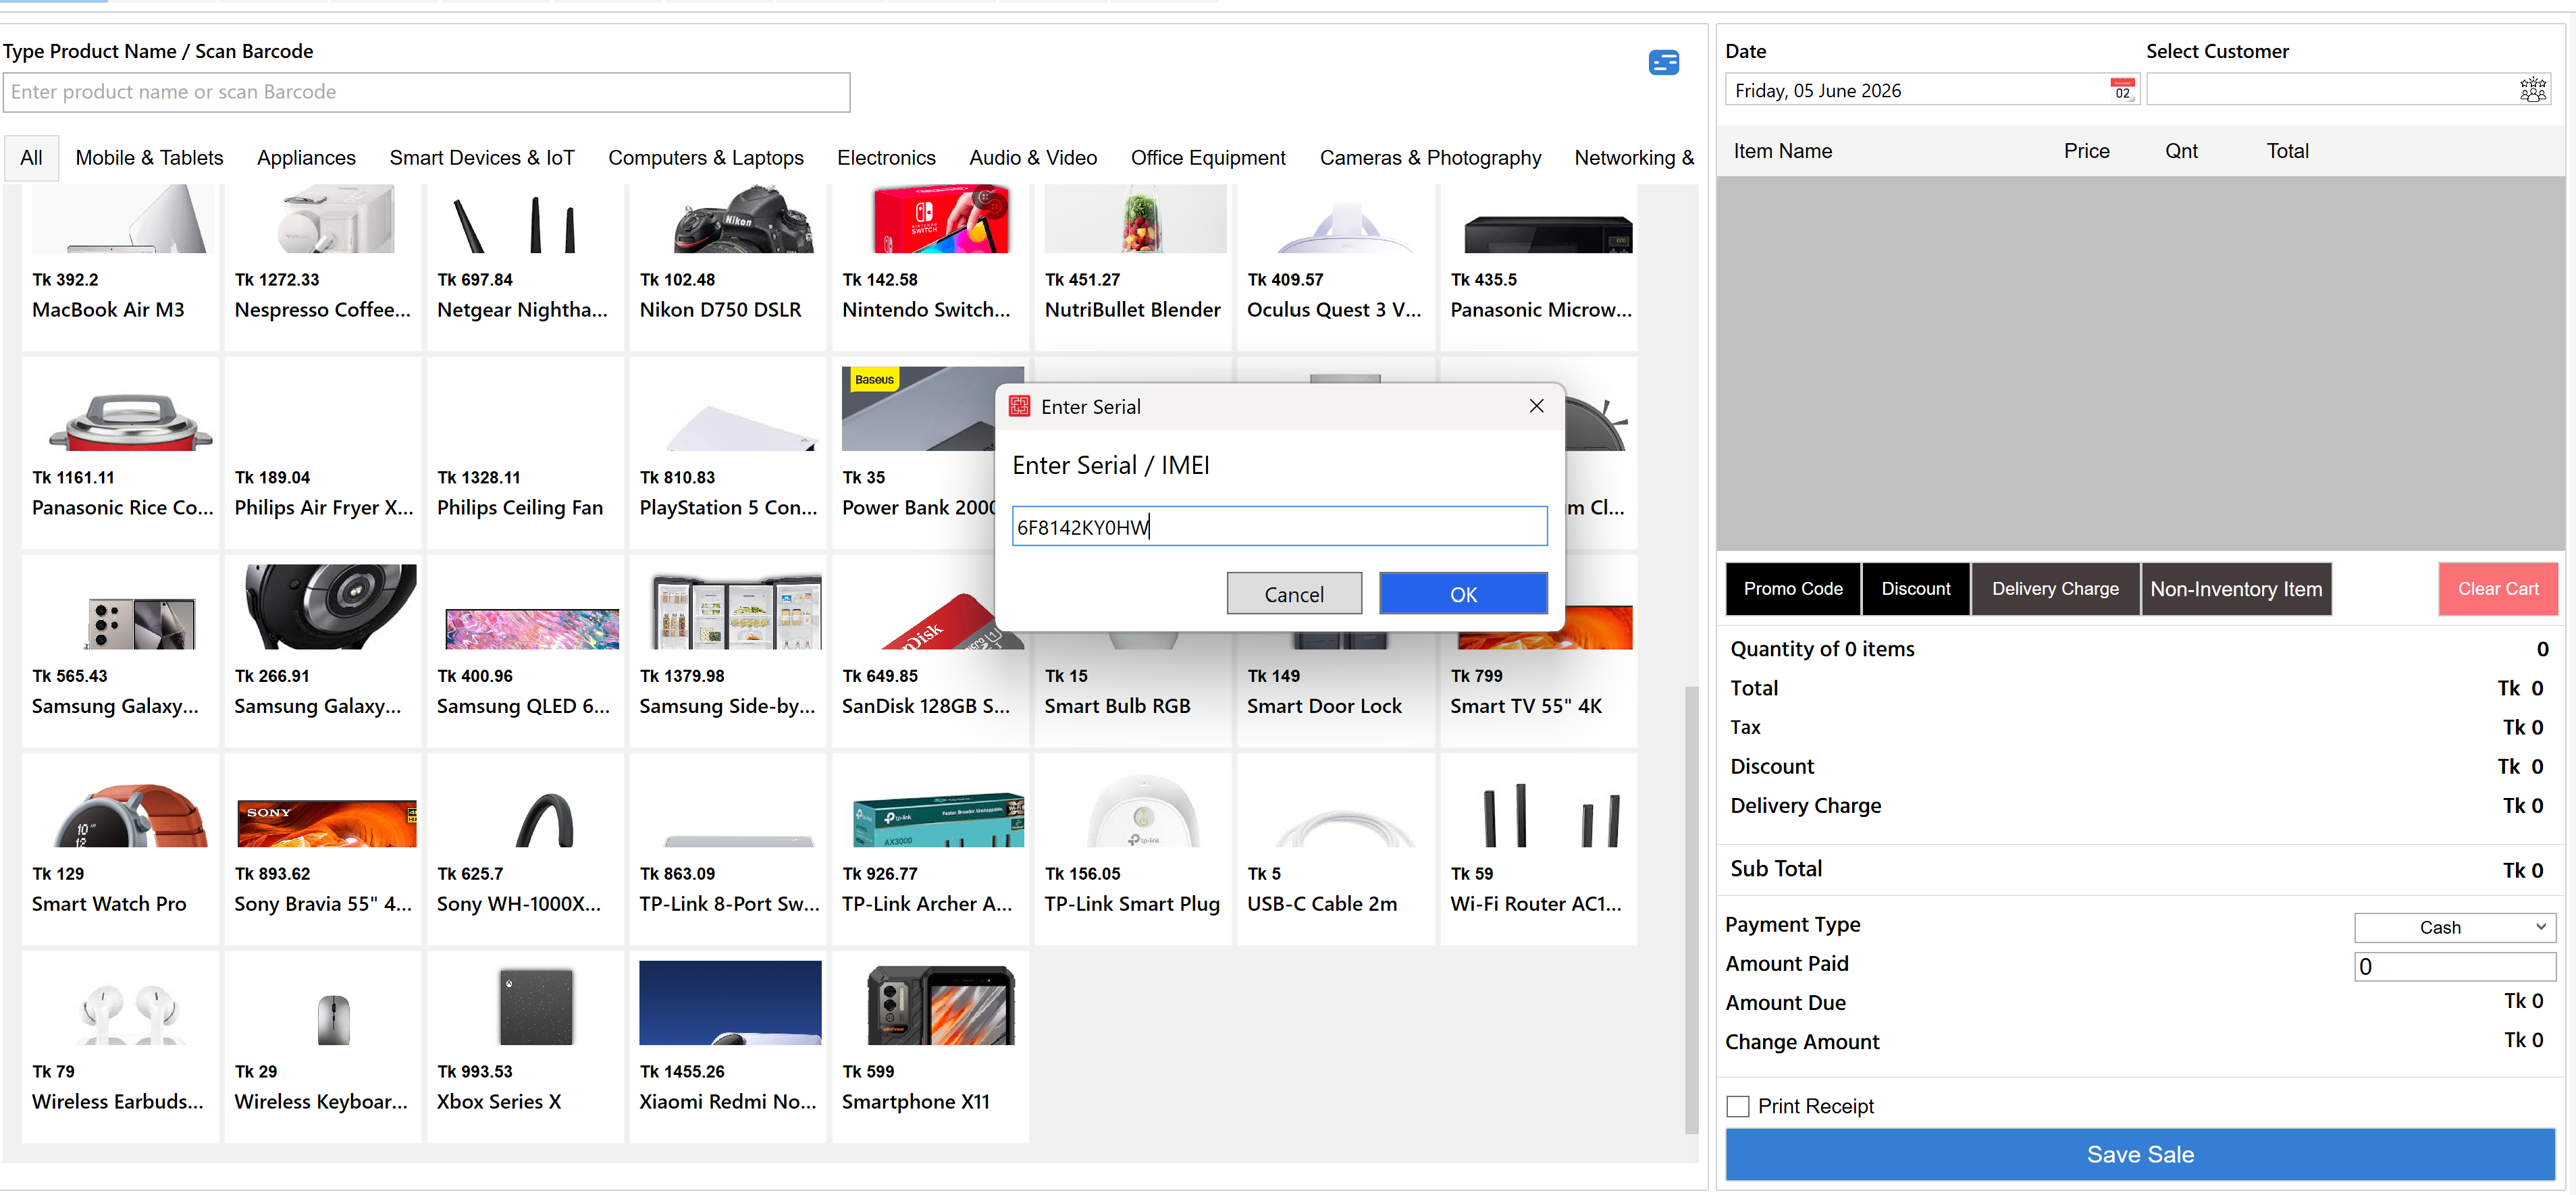
Step 3: Sell an Item Using Serial Number Tracking
Open Desktop POS and add the product to the cart. When a serial-tracked product is added, Nexchar POS automatically displays a serial entry window.
Enter the Product Serial Number and IMEI Number, then click OK.
Important
Before completing the sale, you must select a customer. Customer information is required for:
- Warranty claims
- Customer purchase verification
- Product ownership tracking
Step 4: Search an Invoice Using Serial Number
Sometimes customers, manufacturers, or security agencies may provide only a serial number or IMEI number. To locate the sale:
Go to Main Menu → All Sales. Click the Search Icon on the top-right corner.
A search window will appear. Select Invoice Number or Serial / IMEI, enter the serial number, and click Search.
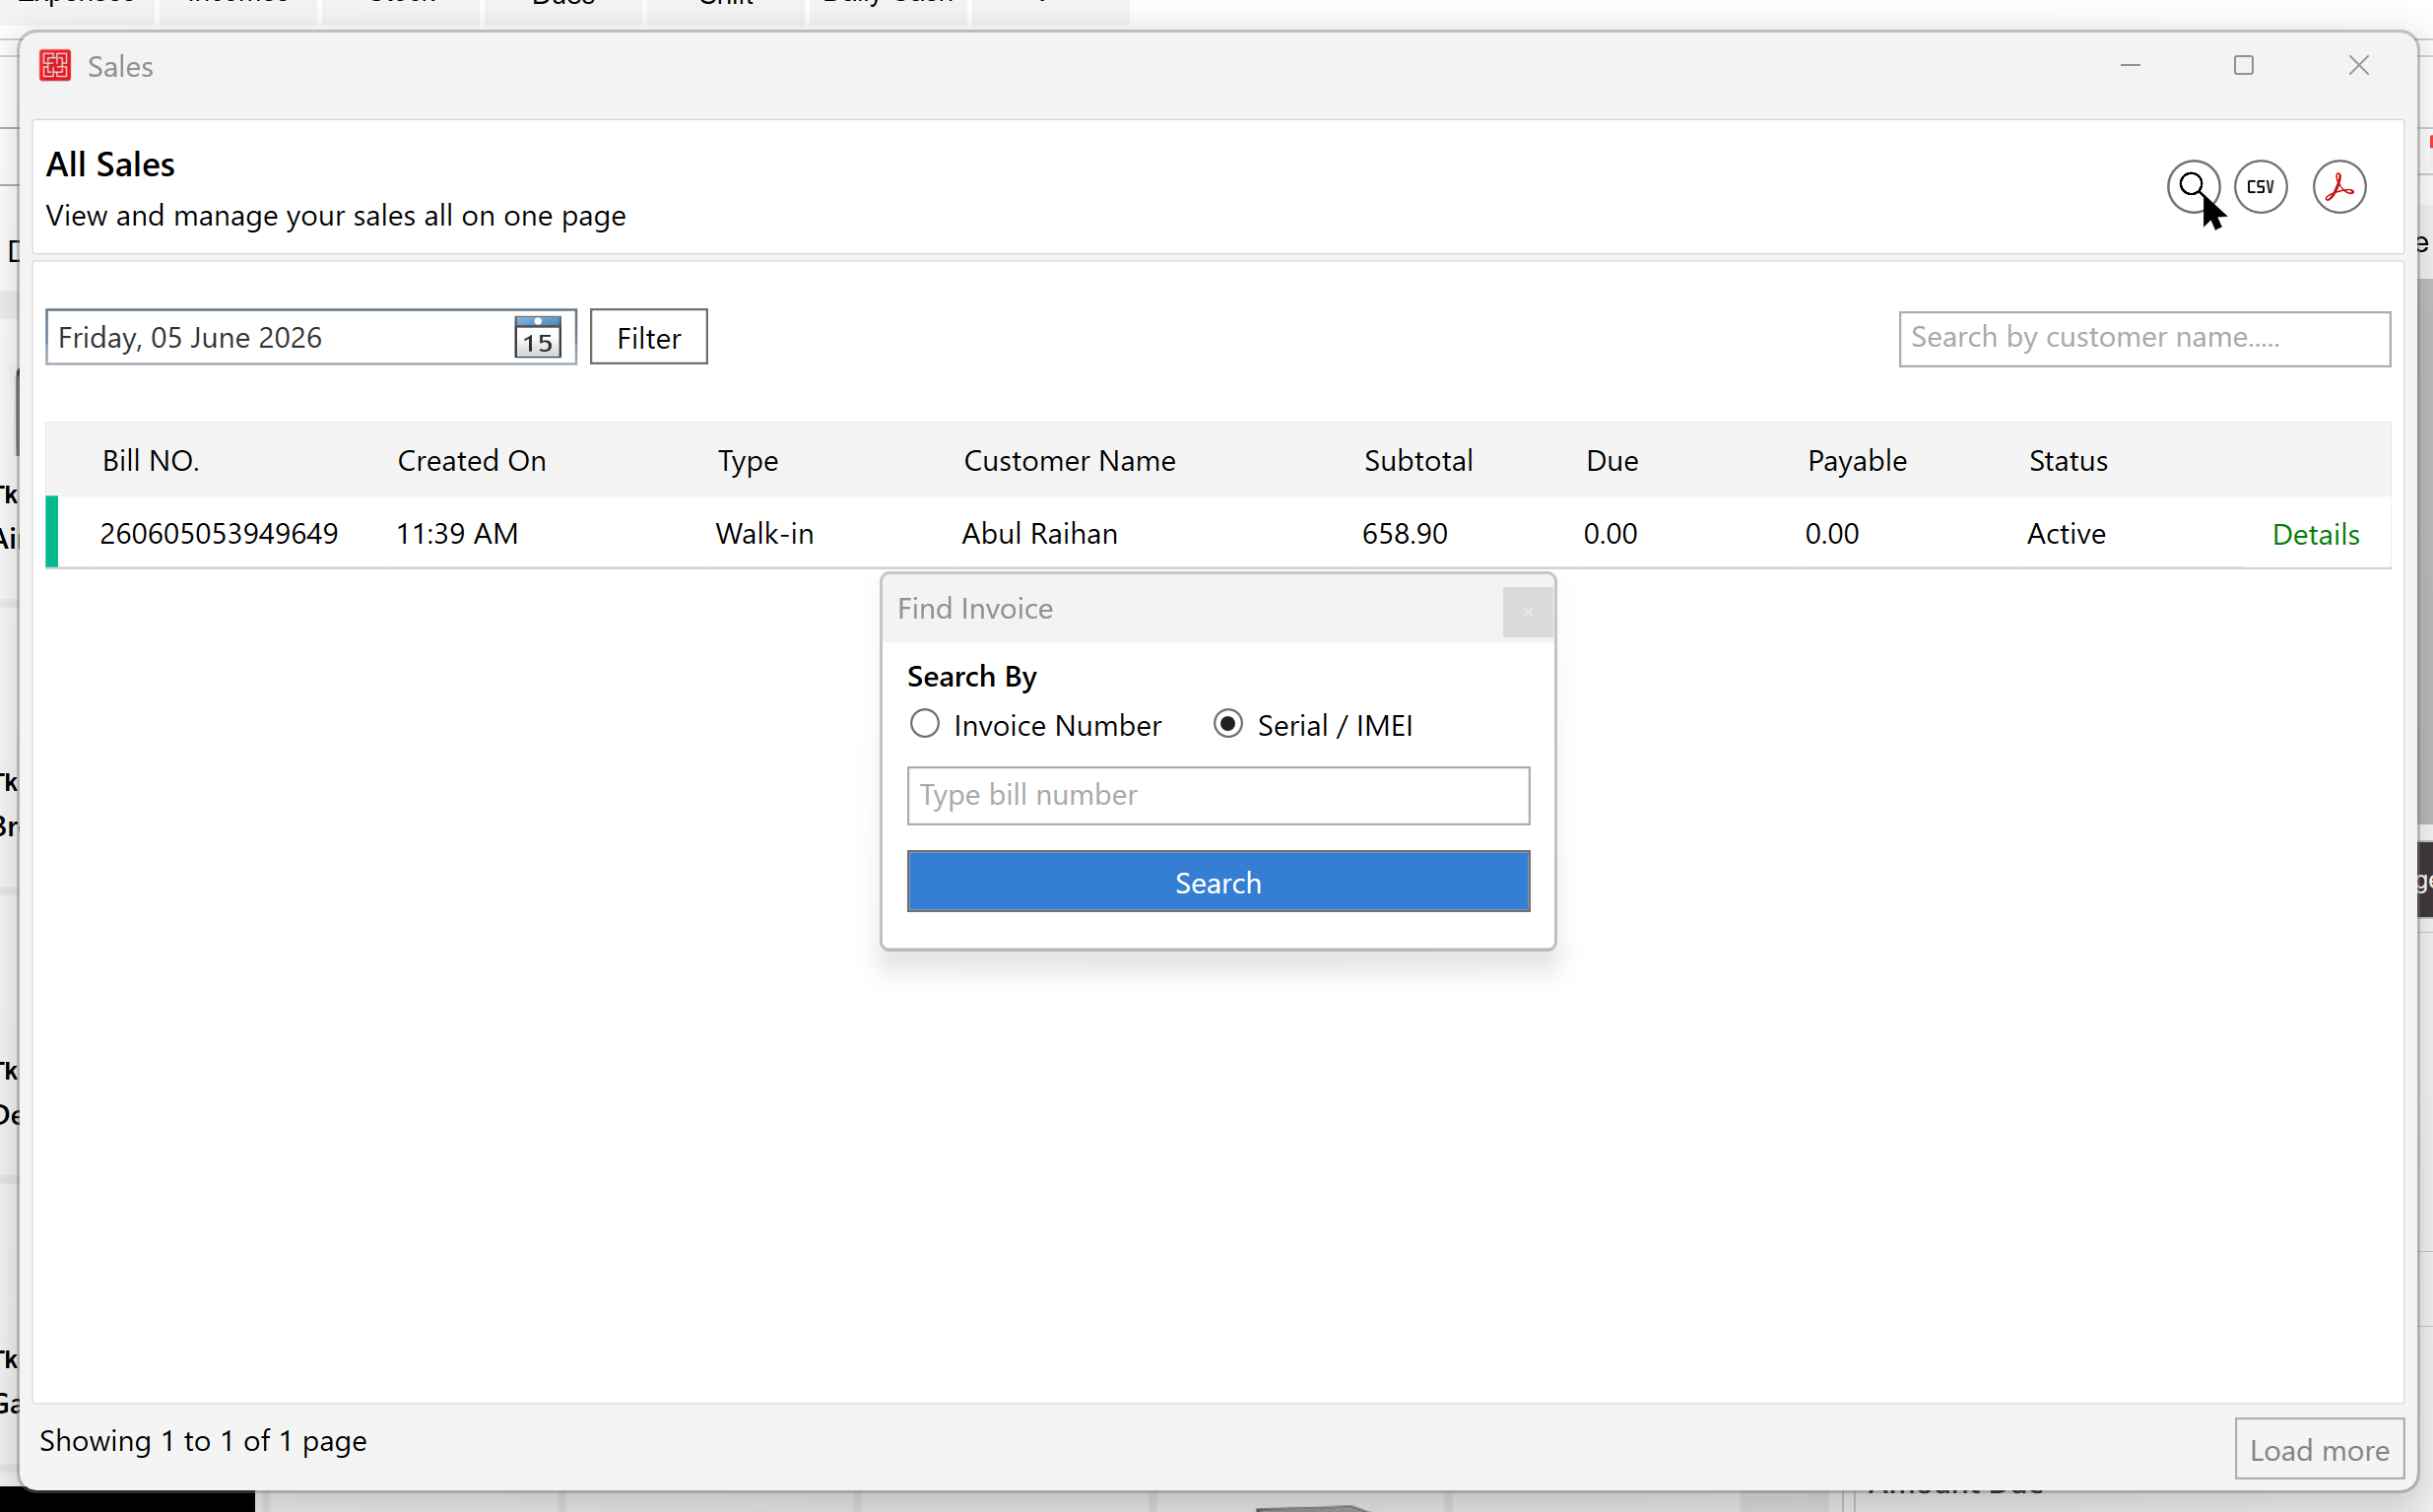
The system will automatically locate the related invoice and sale details.
Step 5: Open Product Serial & Warranty Information
After locating the sale, open the Sales Details page. In the Items section:
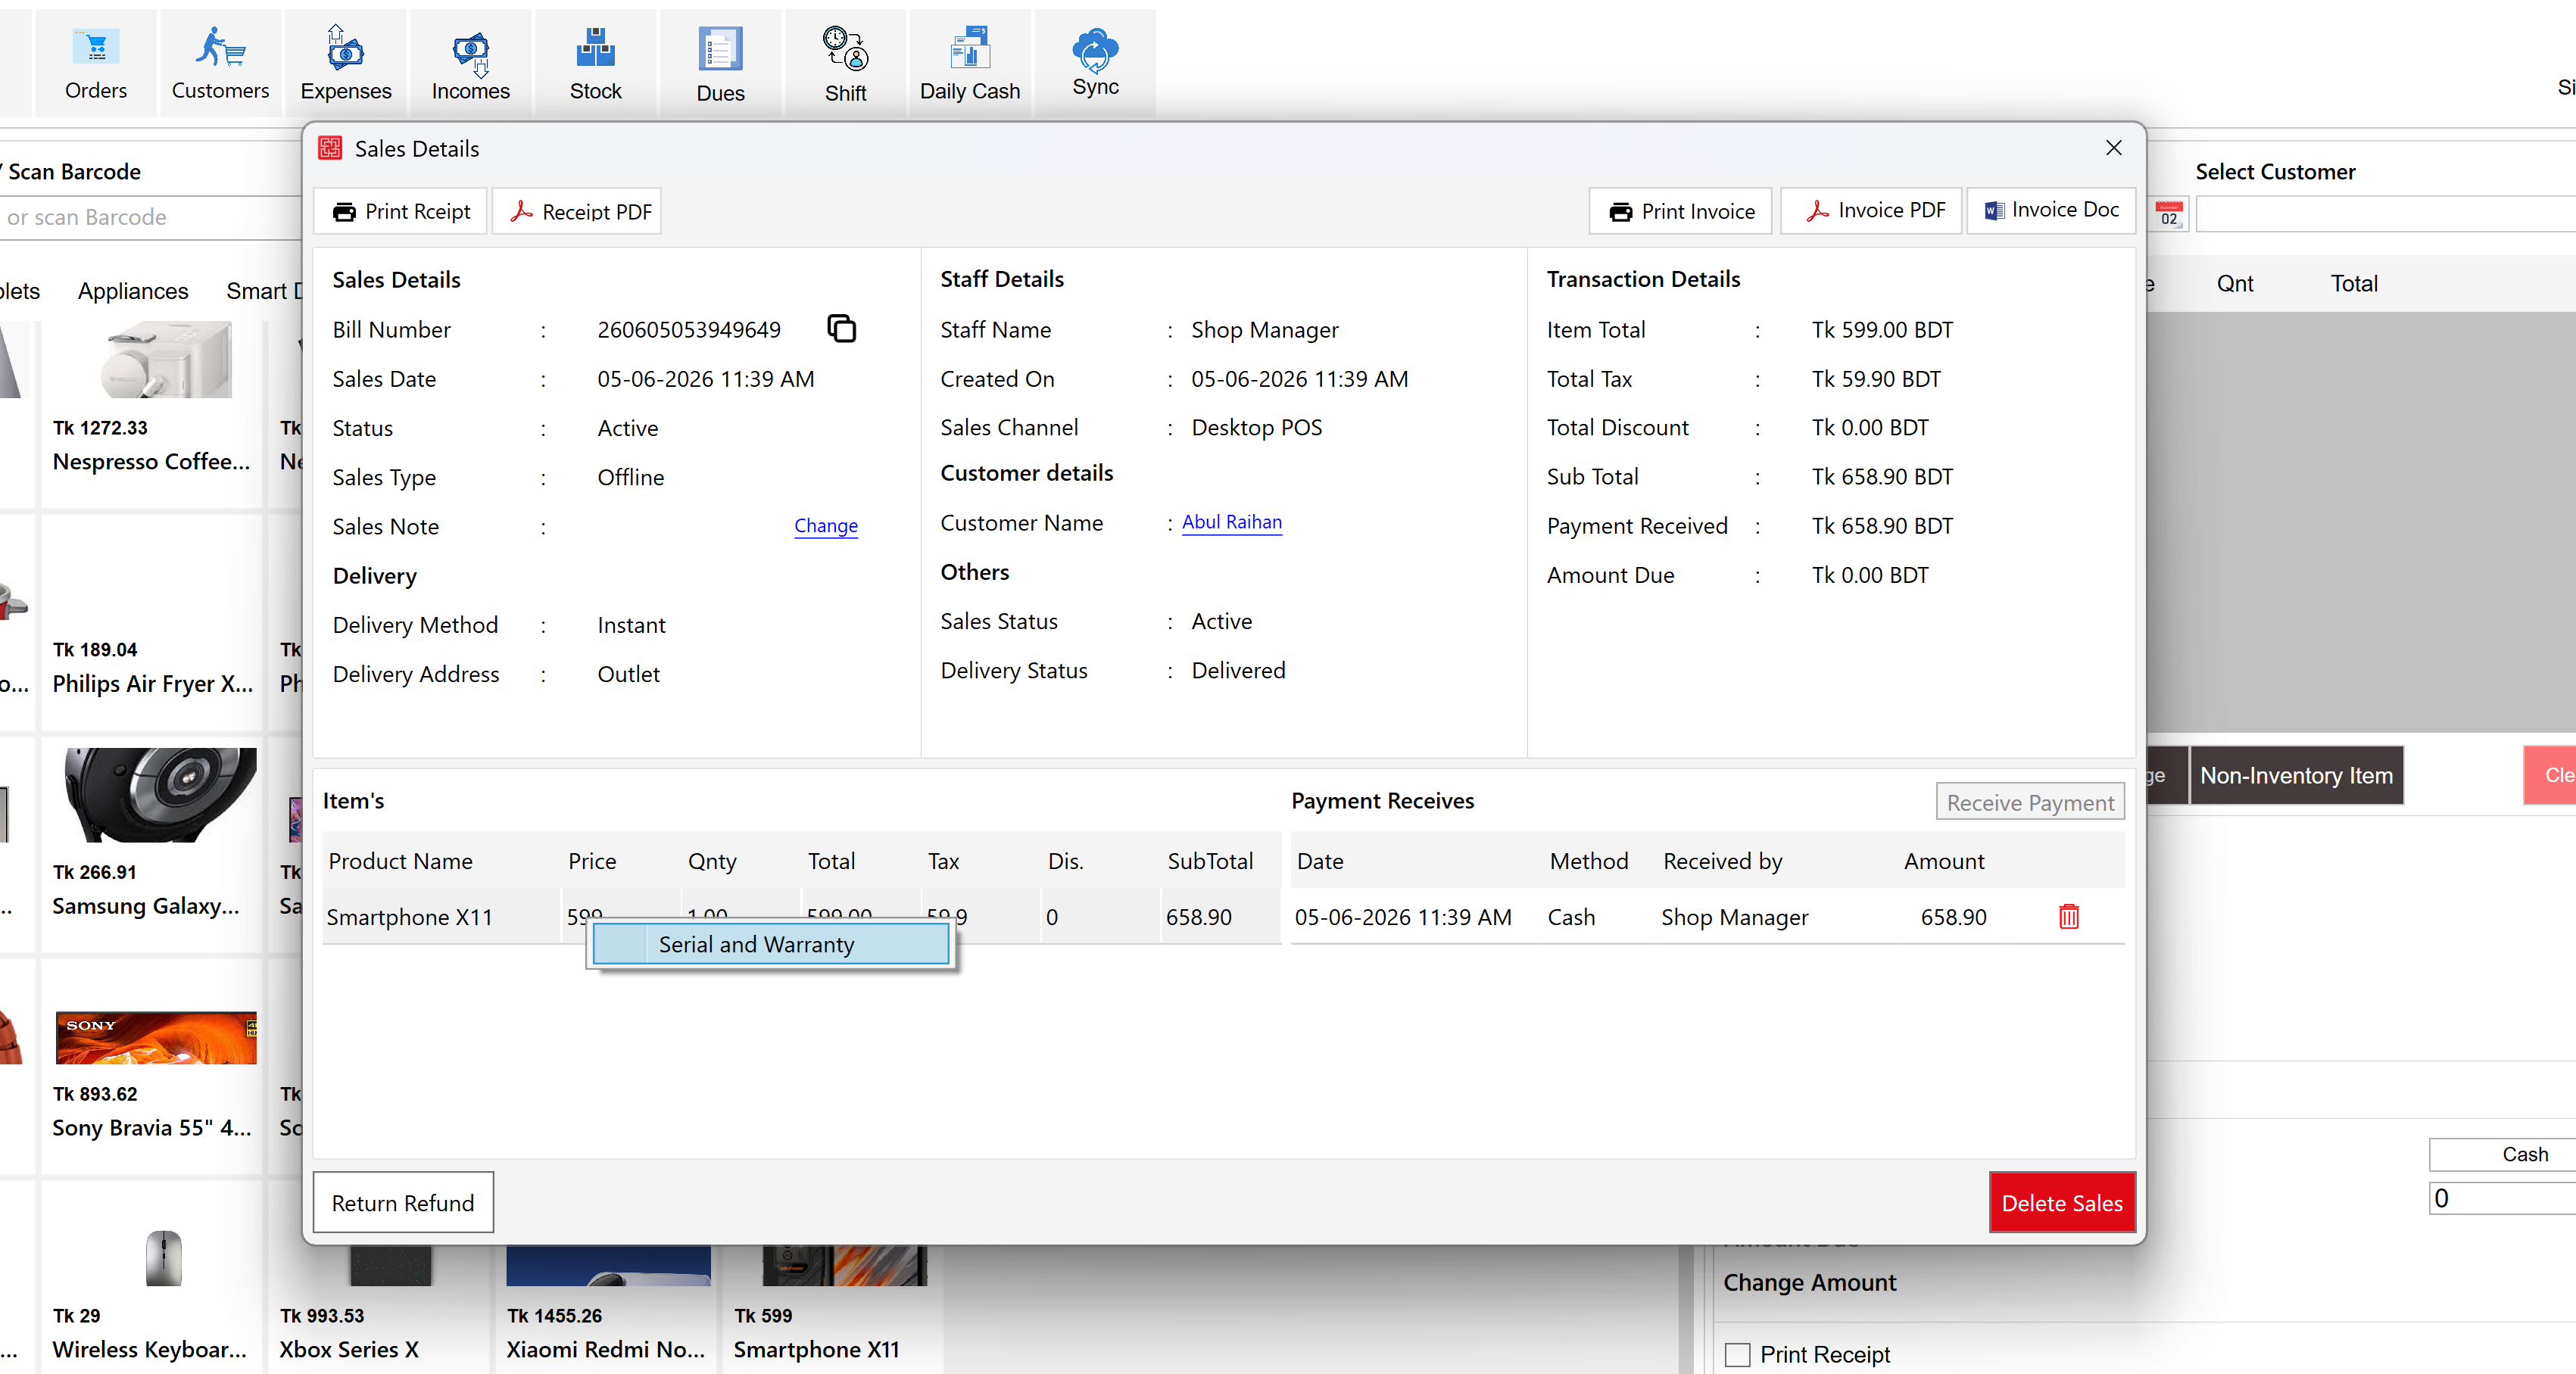
- Right-click the product
- Click Serial and Warranty
A serial and warranty management window will open.
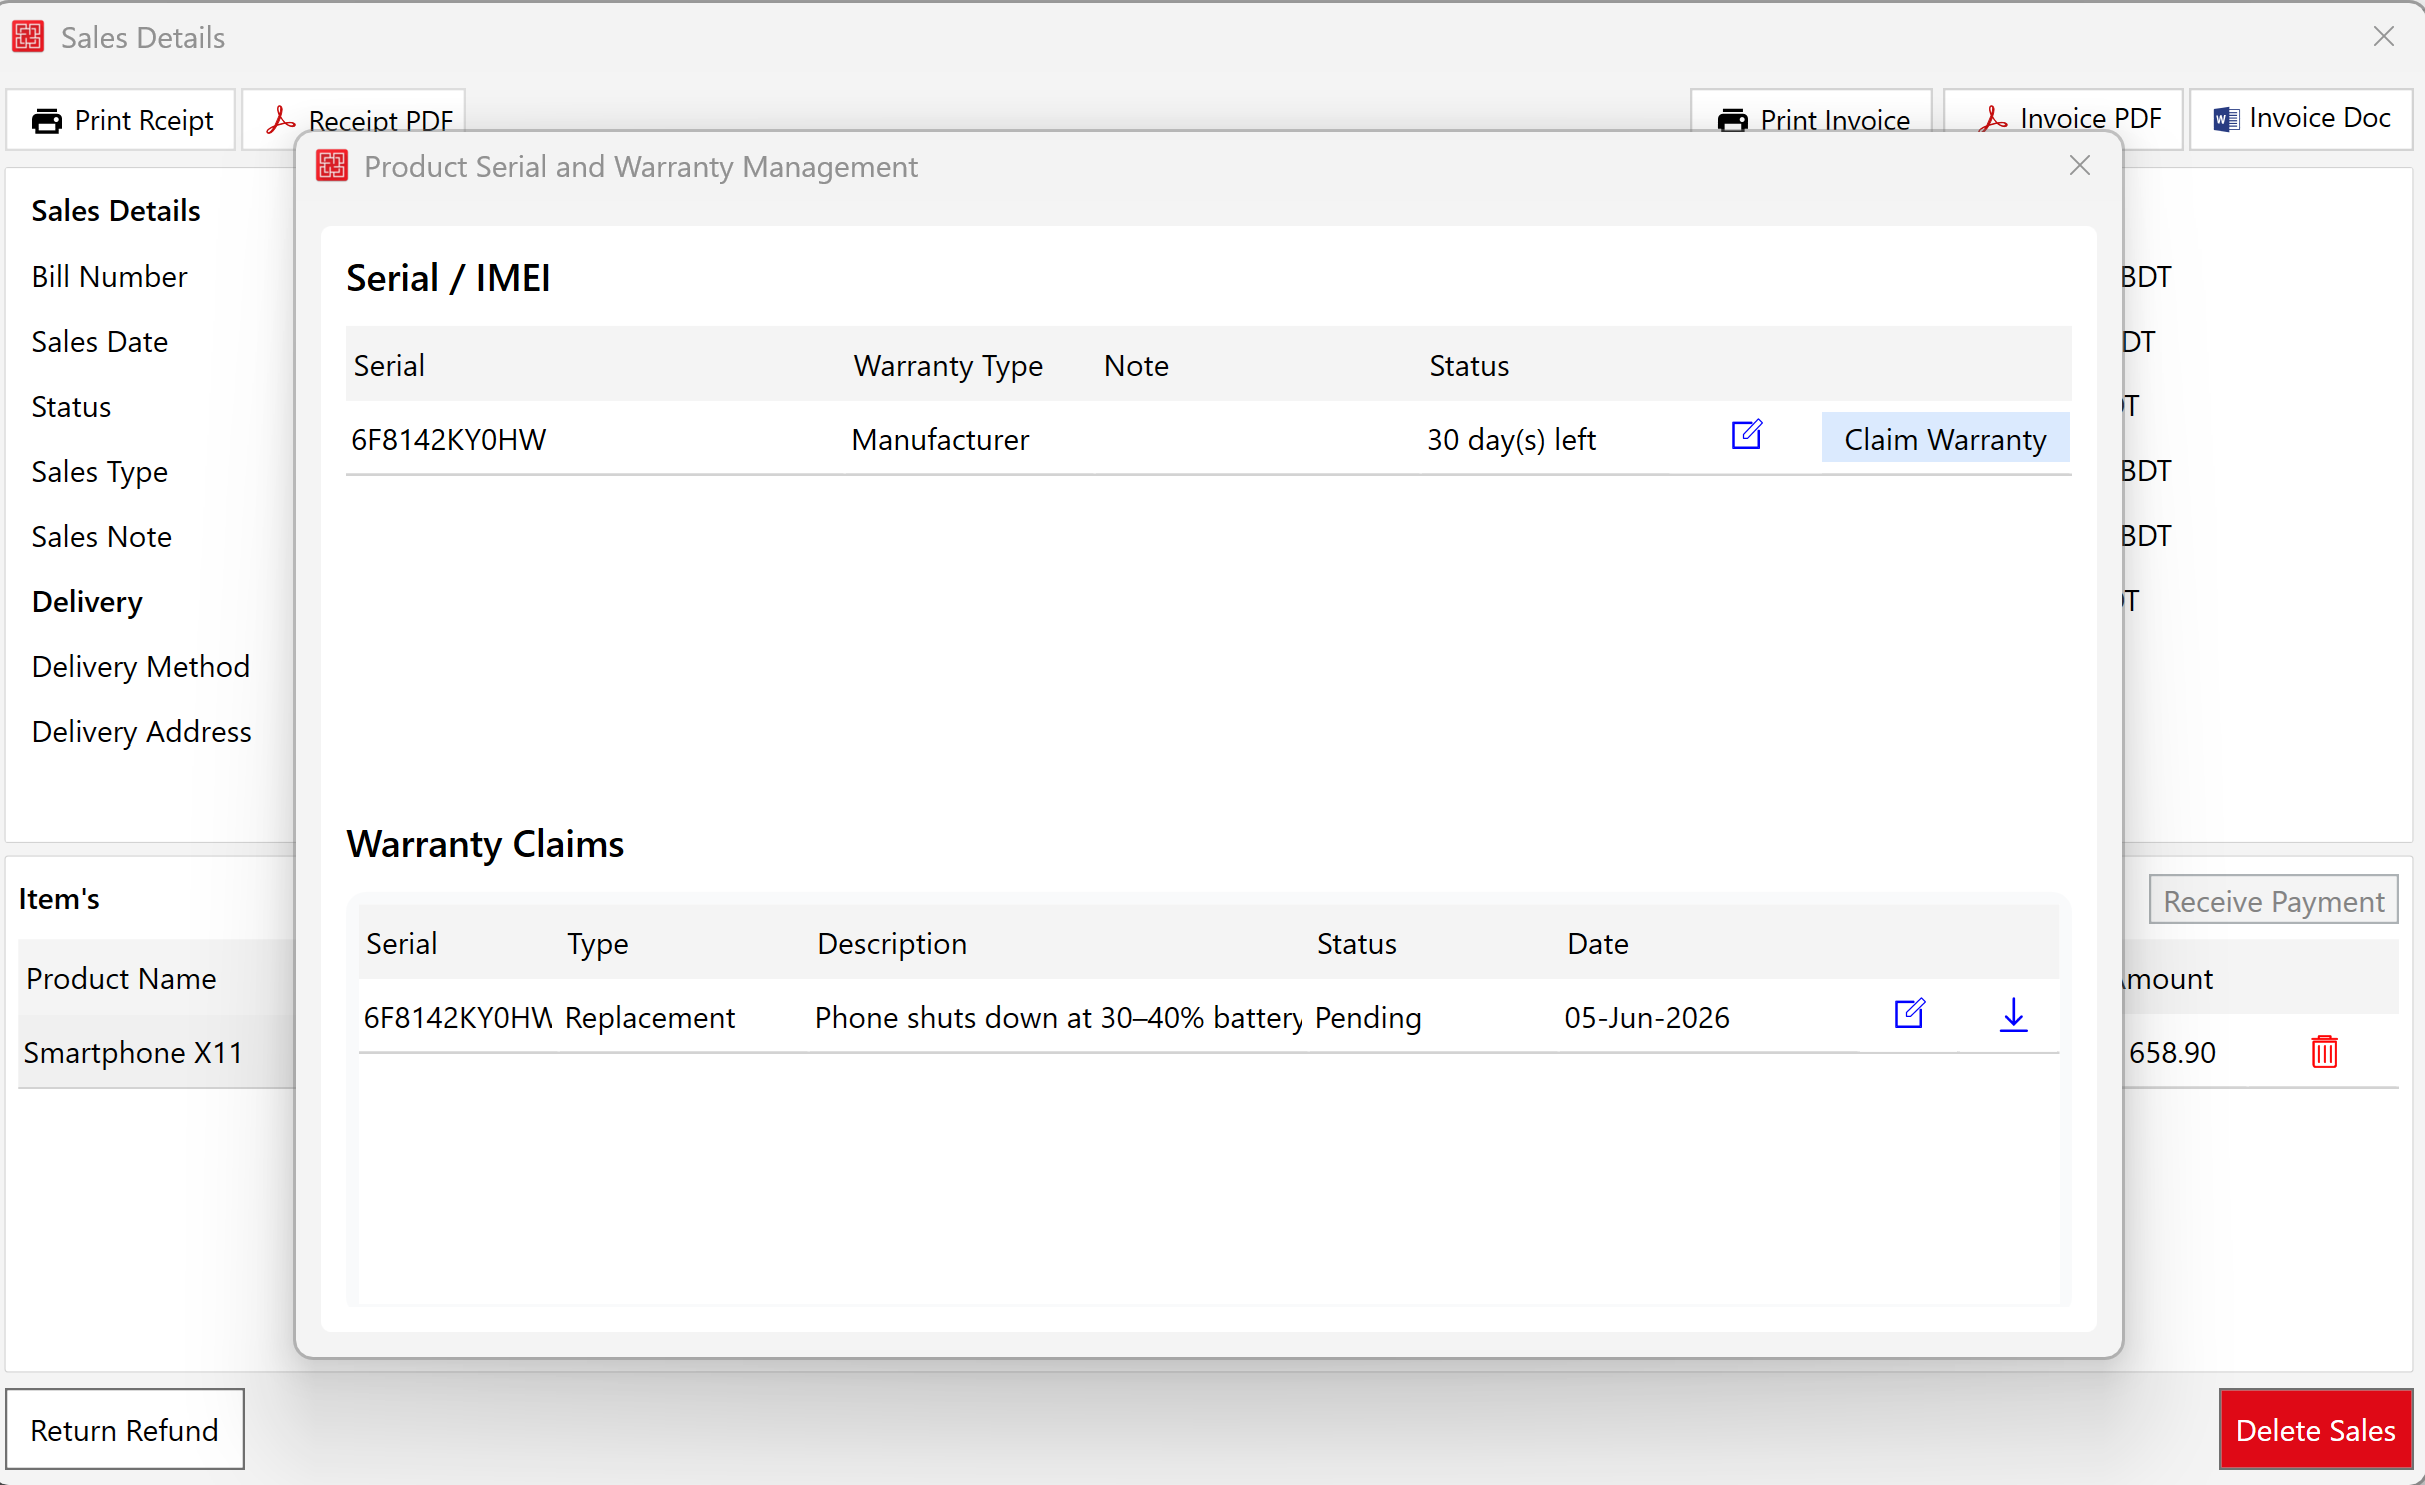
From this screen you can:
- View serial numbers
- Check warranty information
- Review warranty claim history
- Submit warranty claims
Step 6: Submit a Warranty Claim
Inside the Serial & Warranty Management window, click Claim Warranty. Fill in the Claim Type and Problem Description, then click Submit Claim.
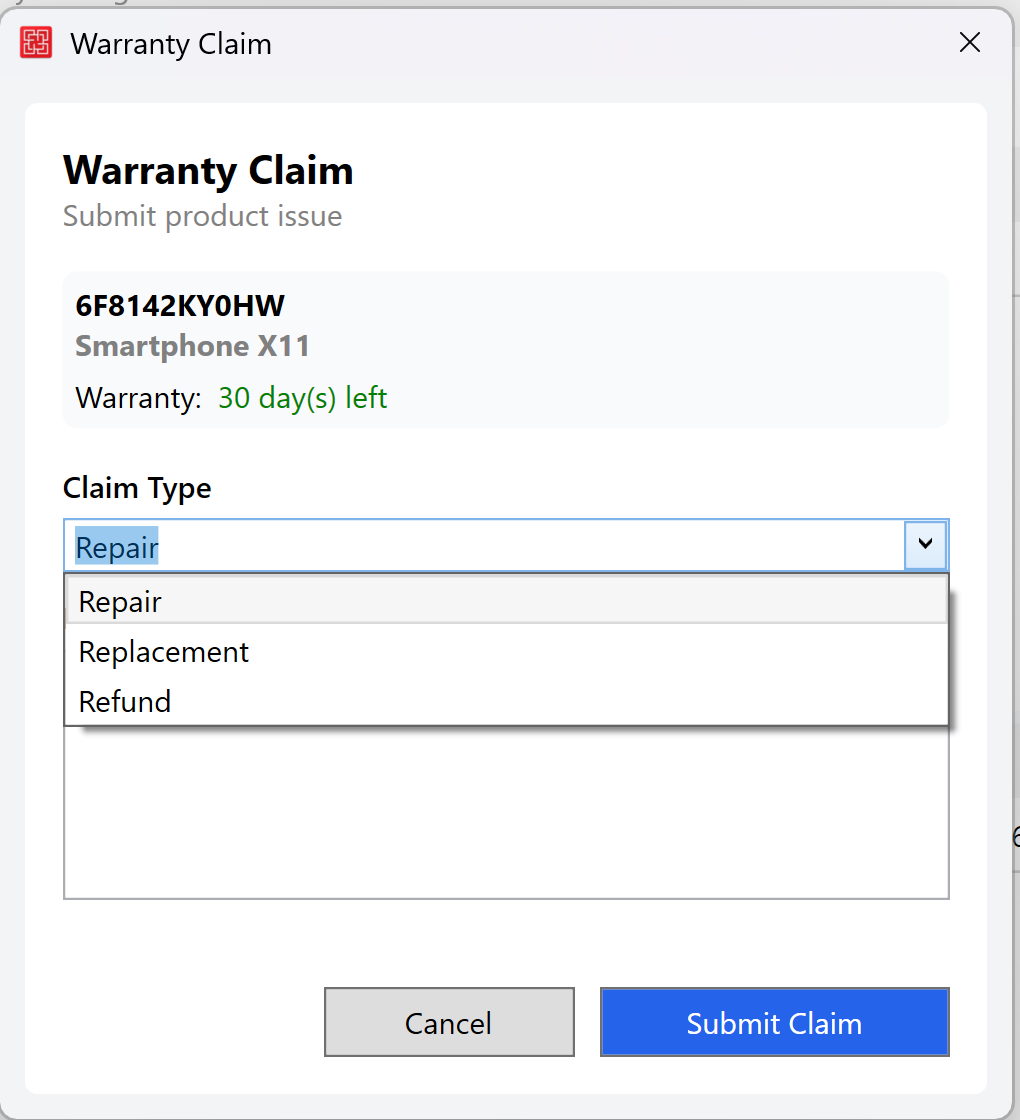
Example Claim Types:
- Repair
- Replacement
- Service
Example Problem Description
Phone shuts down at 30–40% battery and does not turn back on without charging.
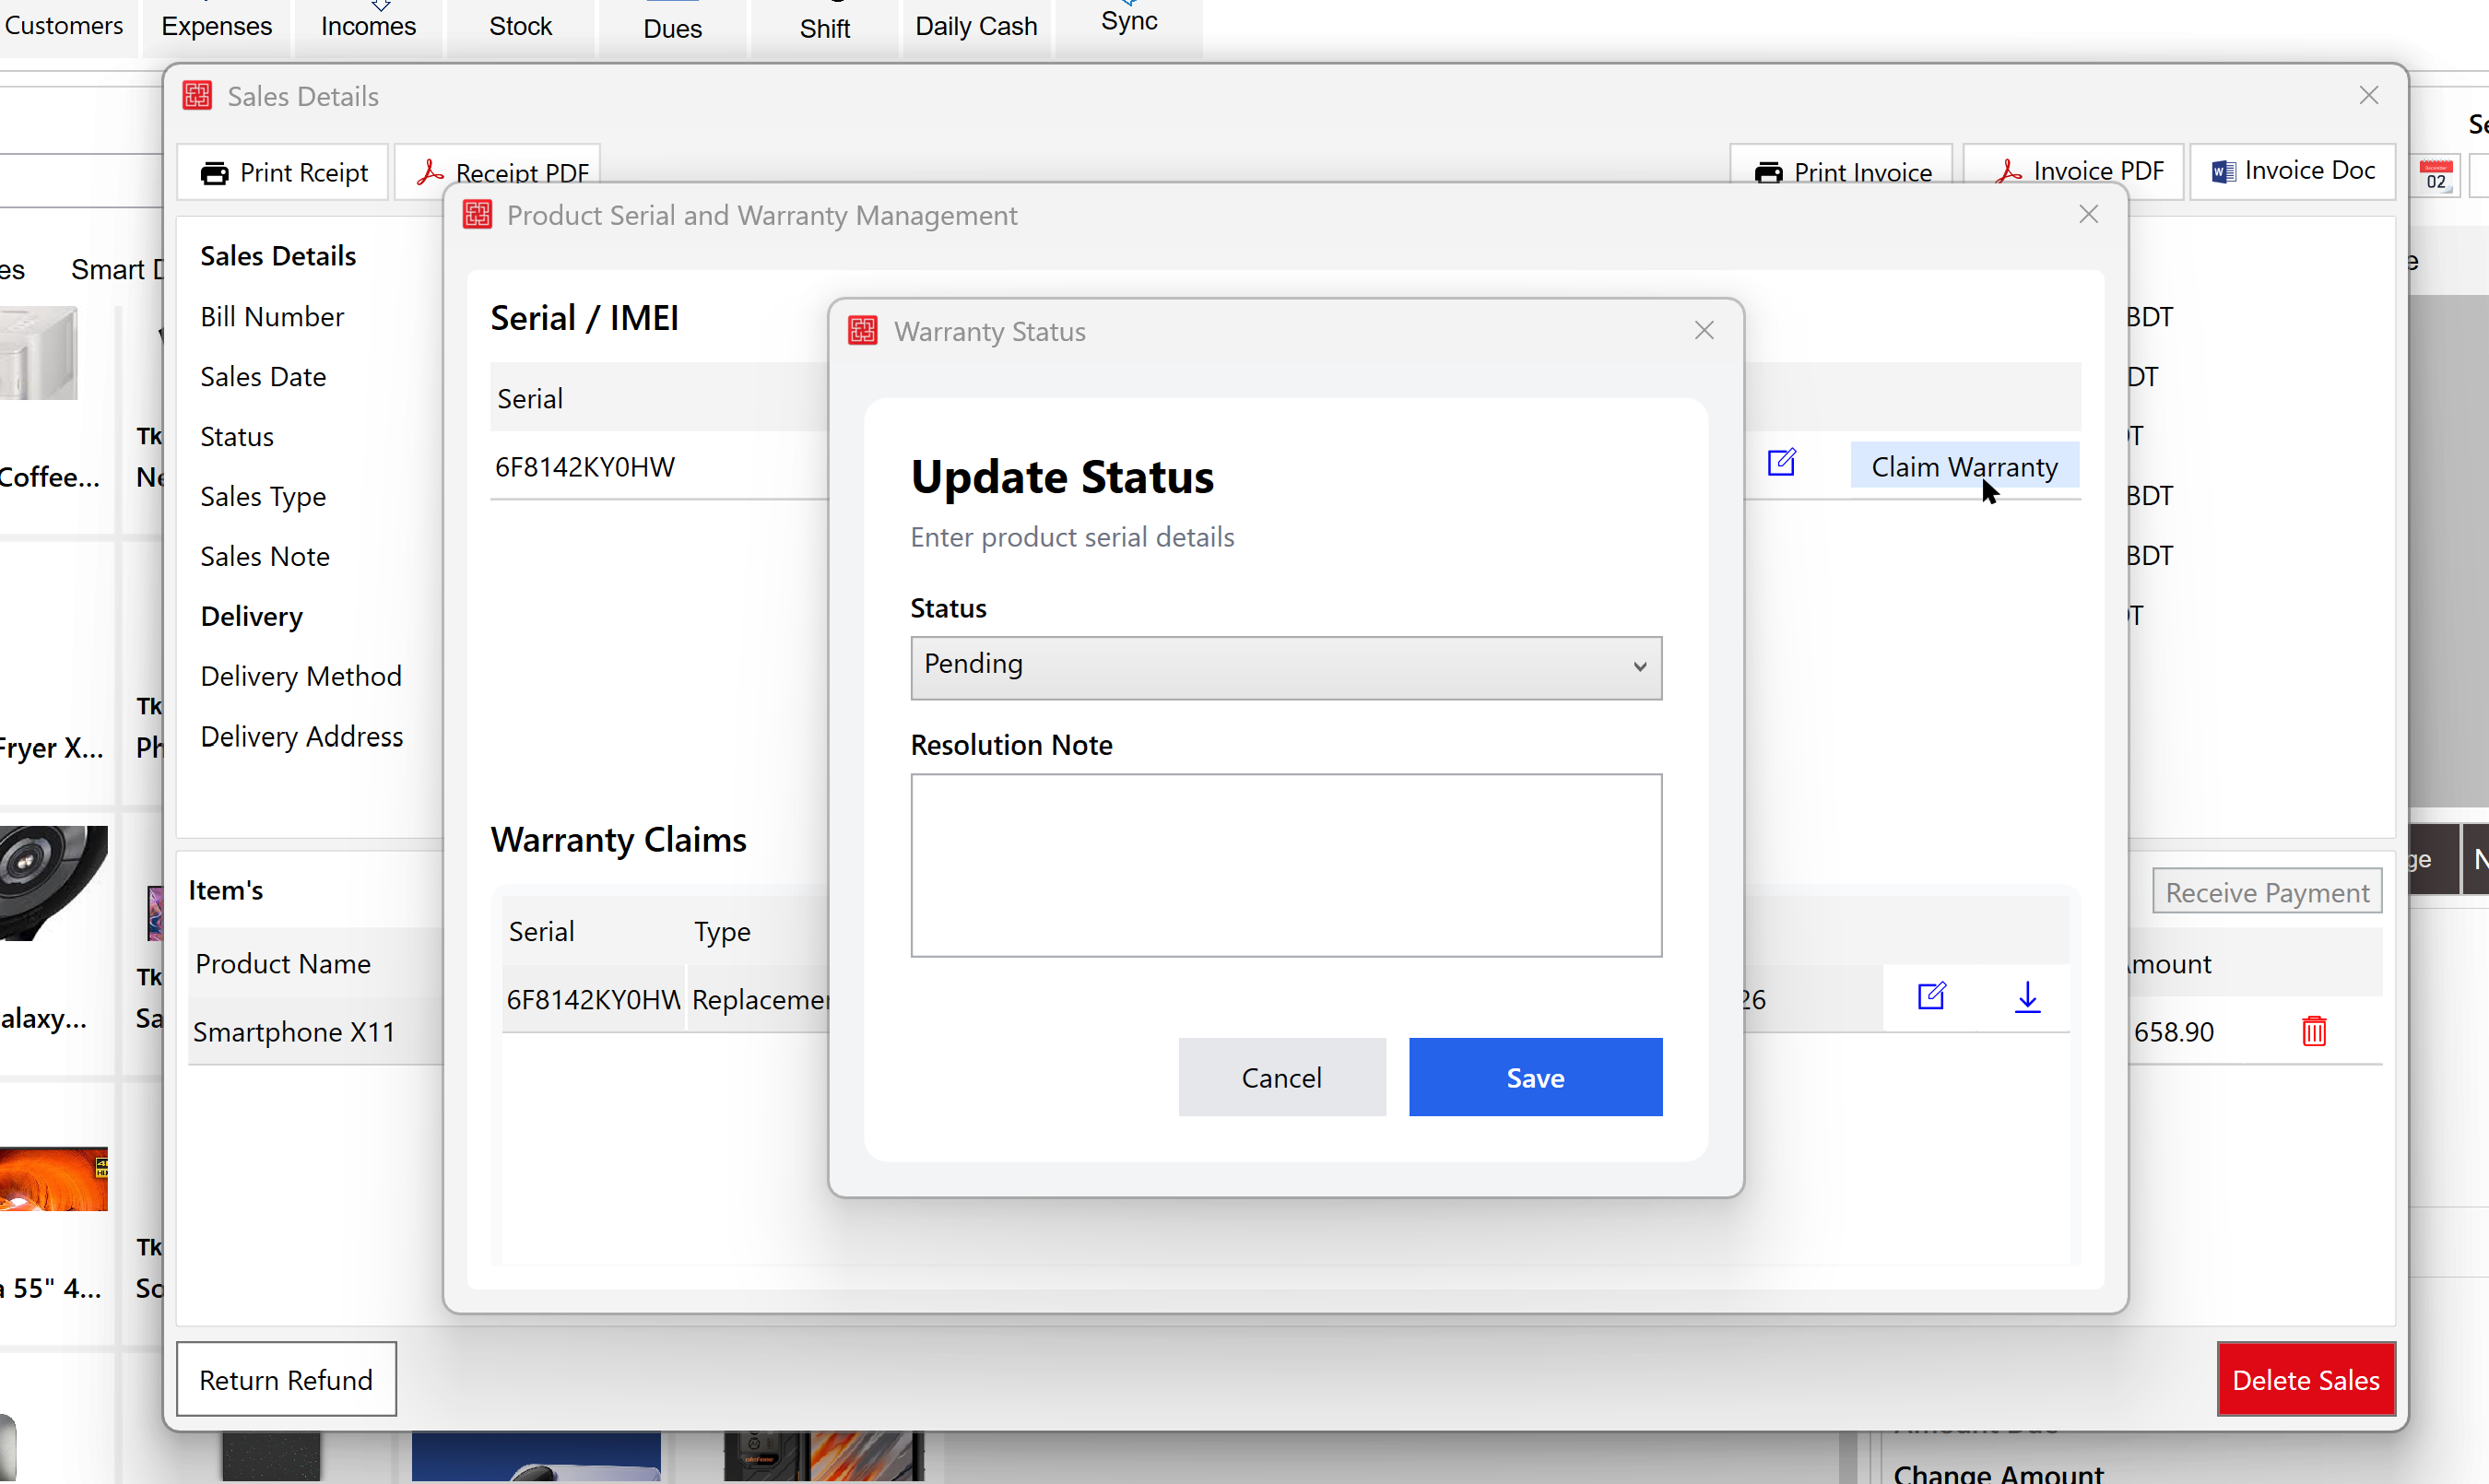
Step 7: Update Warranty Claim Status
Administrators and authorized staff can update the claim status.
| Status | Description |
|---|---|
| Pending | Claim submitted and awaiting review |
| Approved | Warranty claim approved |
| Rejected | Claim rejected |
| InService | Product is currently being serviced |
| Completed | Warranty process completed |
Open the warranty claim and update the status as required.
Step 8: View Warranty Claim History
To view all warranty claims, navigate to Menu → More → Warranty Claim History.
This page displays:
- Claim Number
- Date
- Serial Number
- Problem Description
- Claim Type
- Claim Status
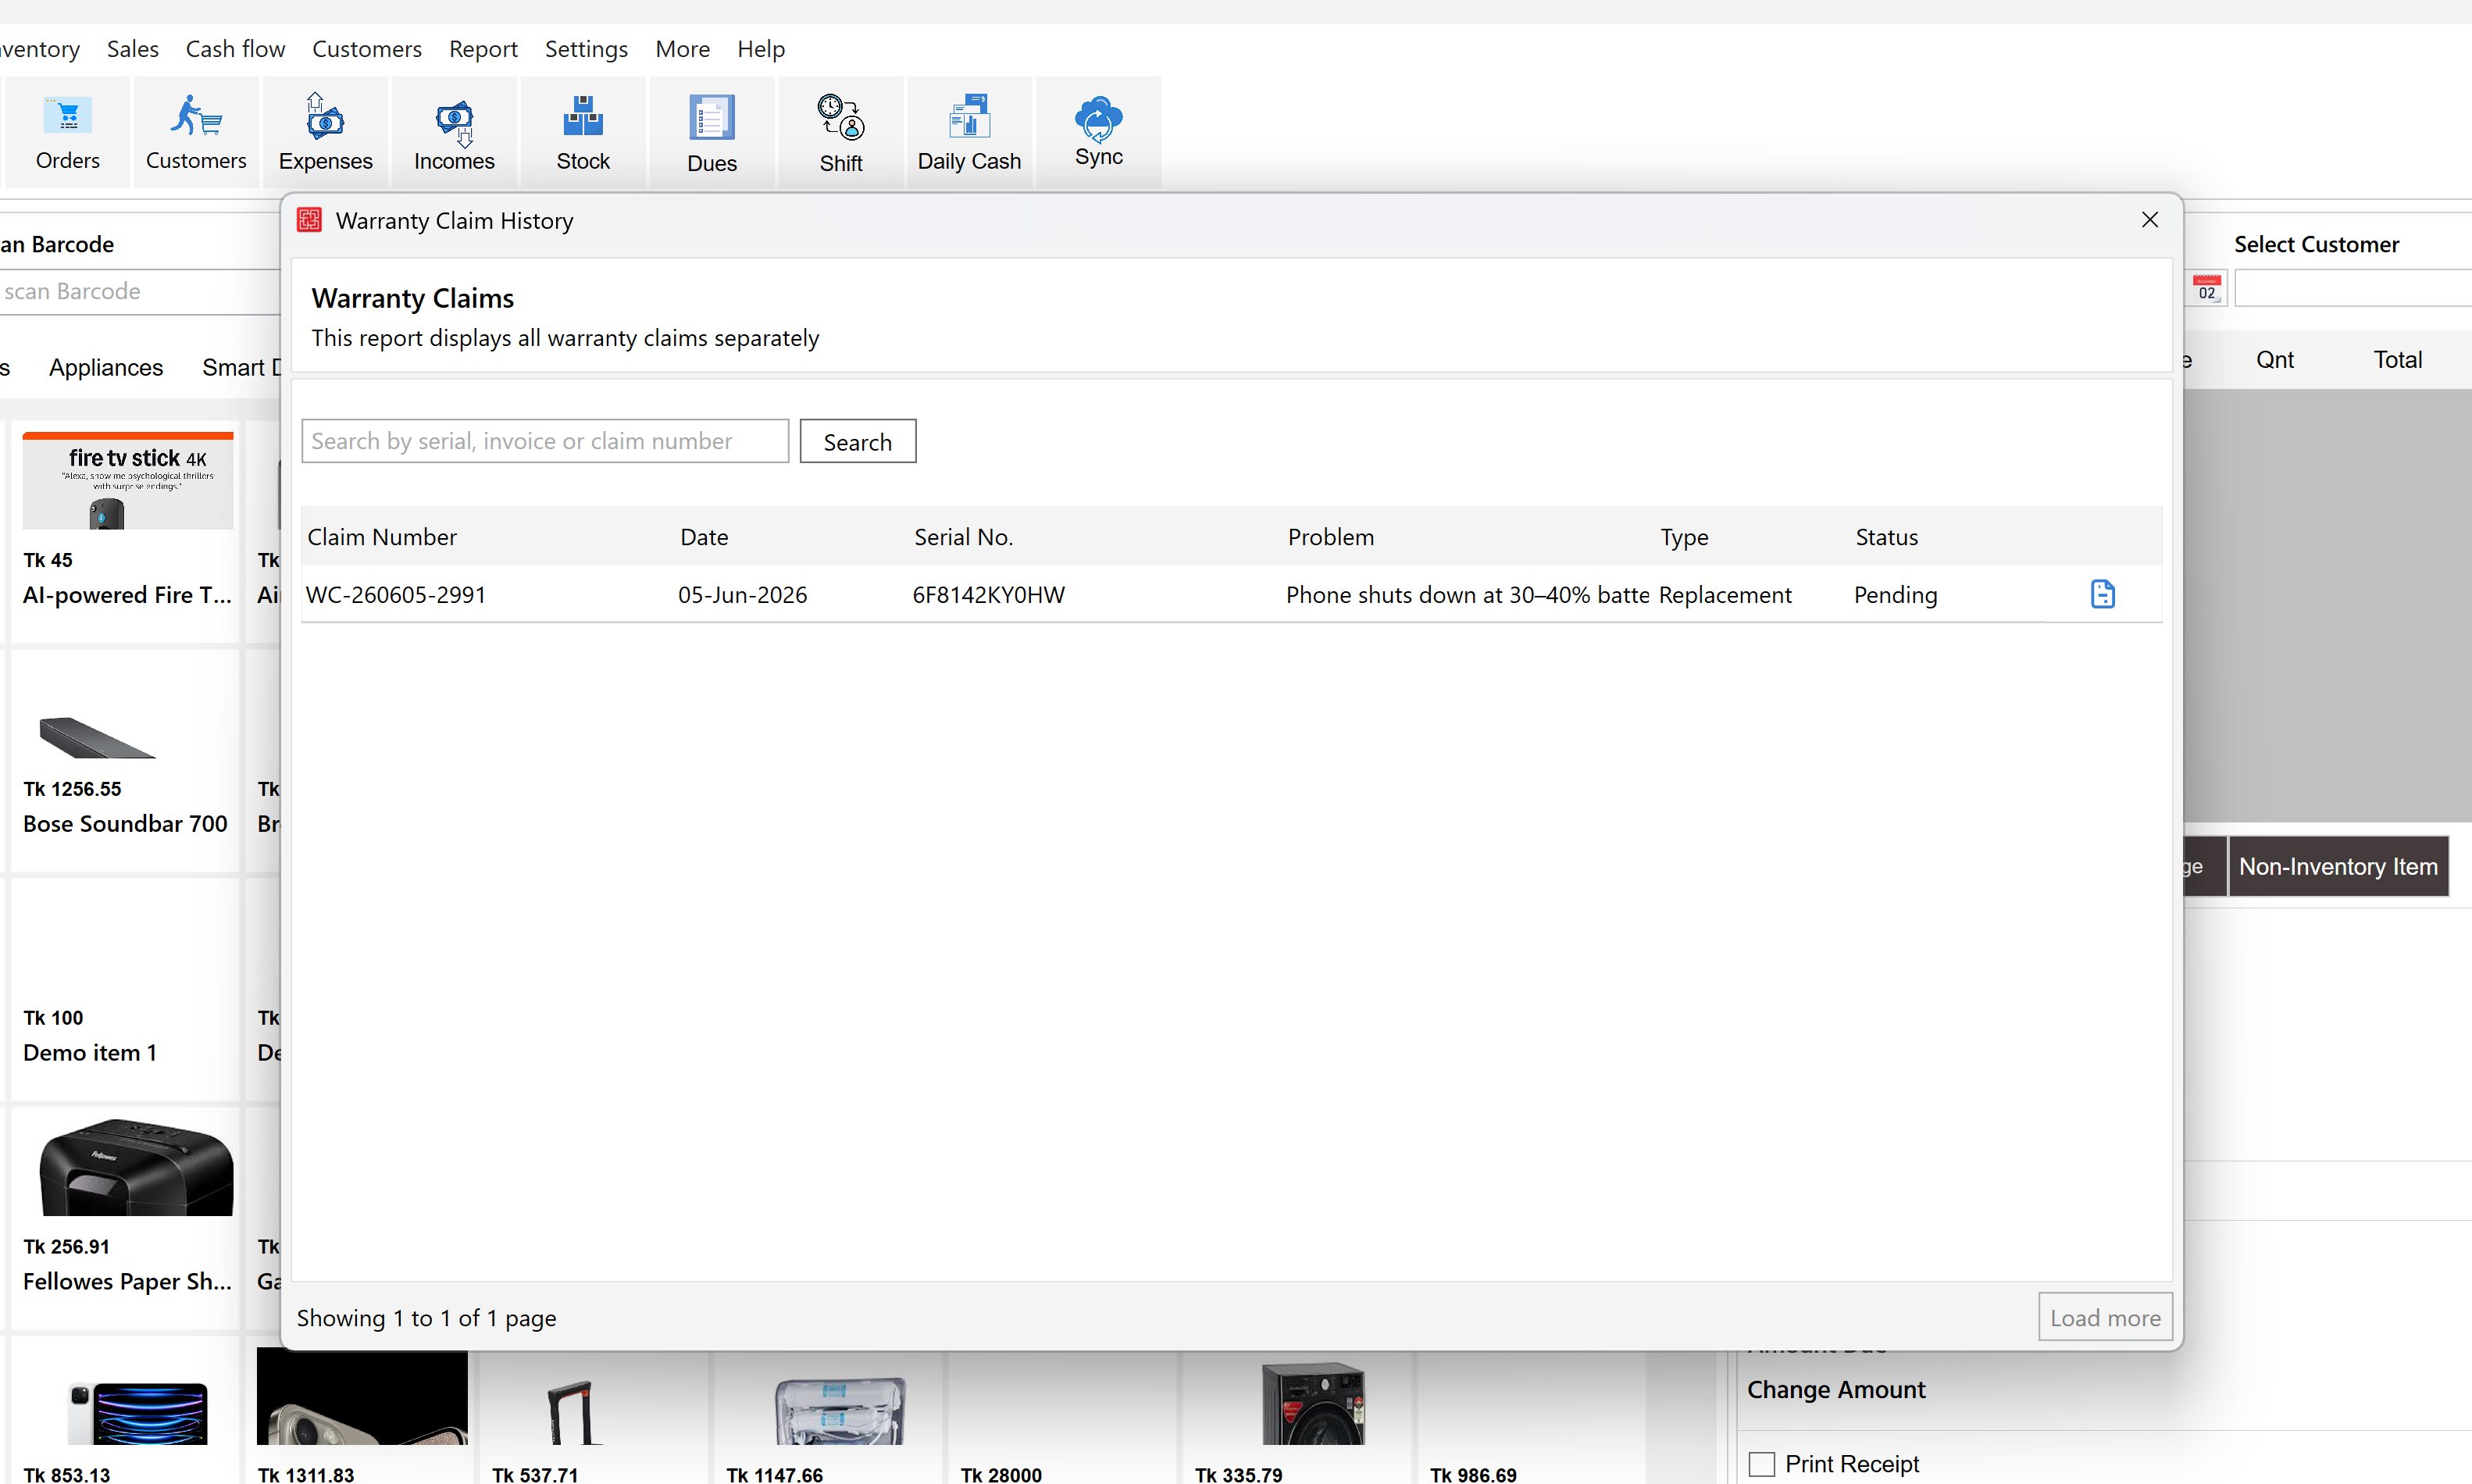
This report helps staff track and manage all warranty-related activities from a single location.
Benefits of Using Serial Number & Warranty Management
Product Traceability
Quickly identify where and when a product was sold.
Customer Verification
Verify ownership using invoice records and serial numbers.
Warranty Tracking
Monitor warranty periods and claim status.
Service Management
Track repairs, replacements, and warranty service history.
Security & Compliance
Assist manufacturers, customers, and security agencies when verifying device ownership.
Current Limitations
Desktop POS Only
This plugin currently works only with Desktop POS.
No Unique Serial Validation
The current version does not prevent duplicate serial number entries. This enhancement is planned for a future release.
Frequently Asked Questions
Can I search sales using an IMEI number?
Yes. Use the Serial / IMEI search option in the All Sales page.
Do I need to select a customer when selling a serial-tracked product?
Yes. Customer information is required for warranty and ownership tracking.
Can I manage warranty claims from the sales invoice?
Yes. Open the Sales Details page, right-click the item, and select Serial and Warranty.
Can warranty status be updated later?
Yes. Authorized staff can update claim statuses to: Pending, Approved, Rejected, InService, or Completed.
Does this feature work on Web POS?
No. Currently, the Serial Number & Warranty Management Plugin supports Desktop POS only.