
How to Create Manual Order for Restaurant from Mobile POS
Nexchar Mobile POS allows restaurants to take orders even without an internet connection. Follow the steps below to enable the necessary settings and create offline orders smoothly.
📌 Key Takeaways
Nexchar Mobile POS lets you take orders
Requires enabling Restaurant Order Management plugin first
Simple 5-step process to create & save offline orders
Works for dine-in, takeaway, delivery, and more
🔧 Step 1: Enable Restaurant Order Management Plugin
Before creating an order, make sure the Restaurant Order Management plugin is enabled.
Go to the Backoffice.
Navigate to Menu > Settings > Plugins.
Locate Restaurant Order Management and click Install.

This enables features like add-ons, table service, and kitchen printing.
Step 2: How to Create a Component / Add-on Item
Before adding extras such as cheese, bacon, or fried eggs to a restaurant order, you must first create these items in the Backoffice and mark them as used components.
- Open the Backoffice and navigate to the item creation page.
- Enter the item name, such as Cheese, and configure the necessary item details.
- Under the Sales Channels section, enable
Mark used components. - Save the item. Repeat these steps for other ingredients or extras you want to use.
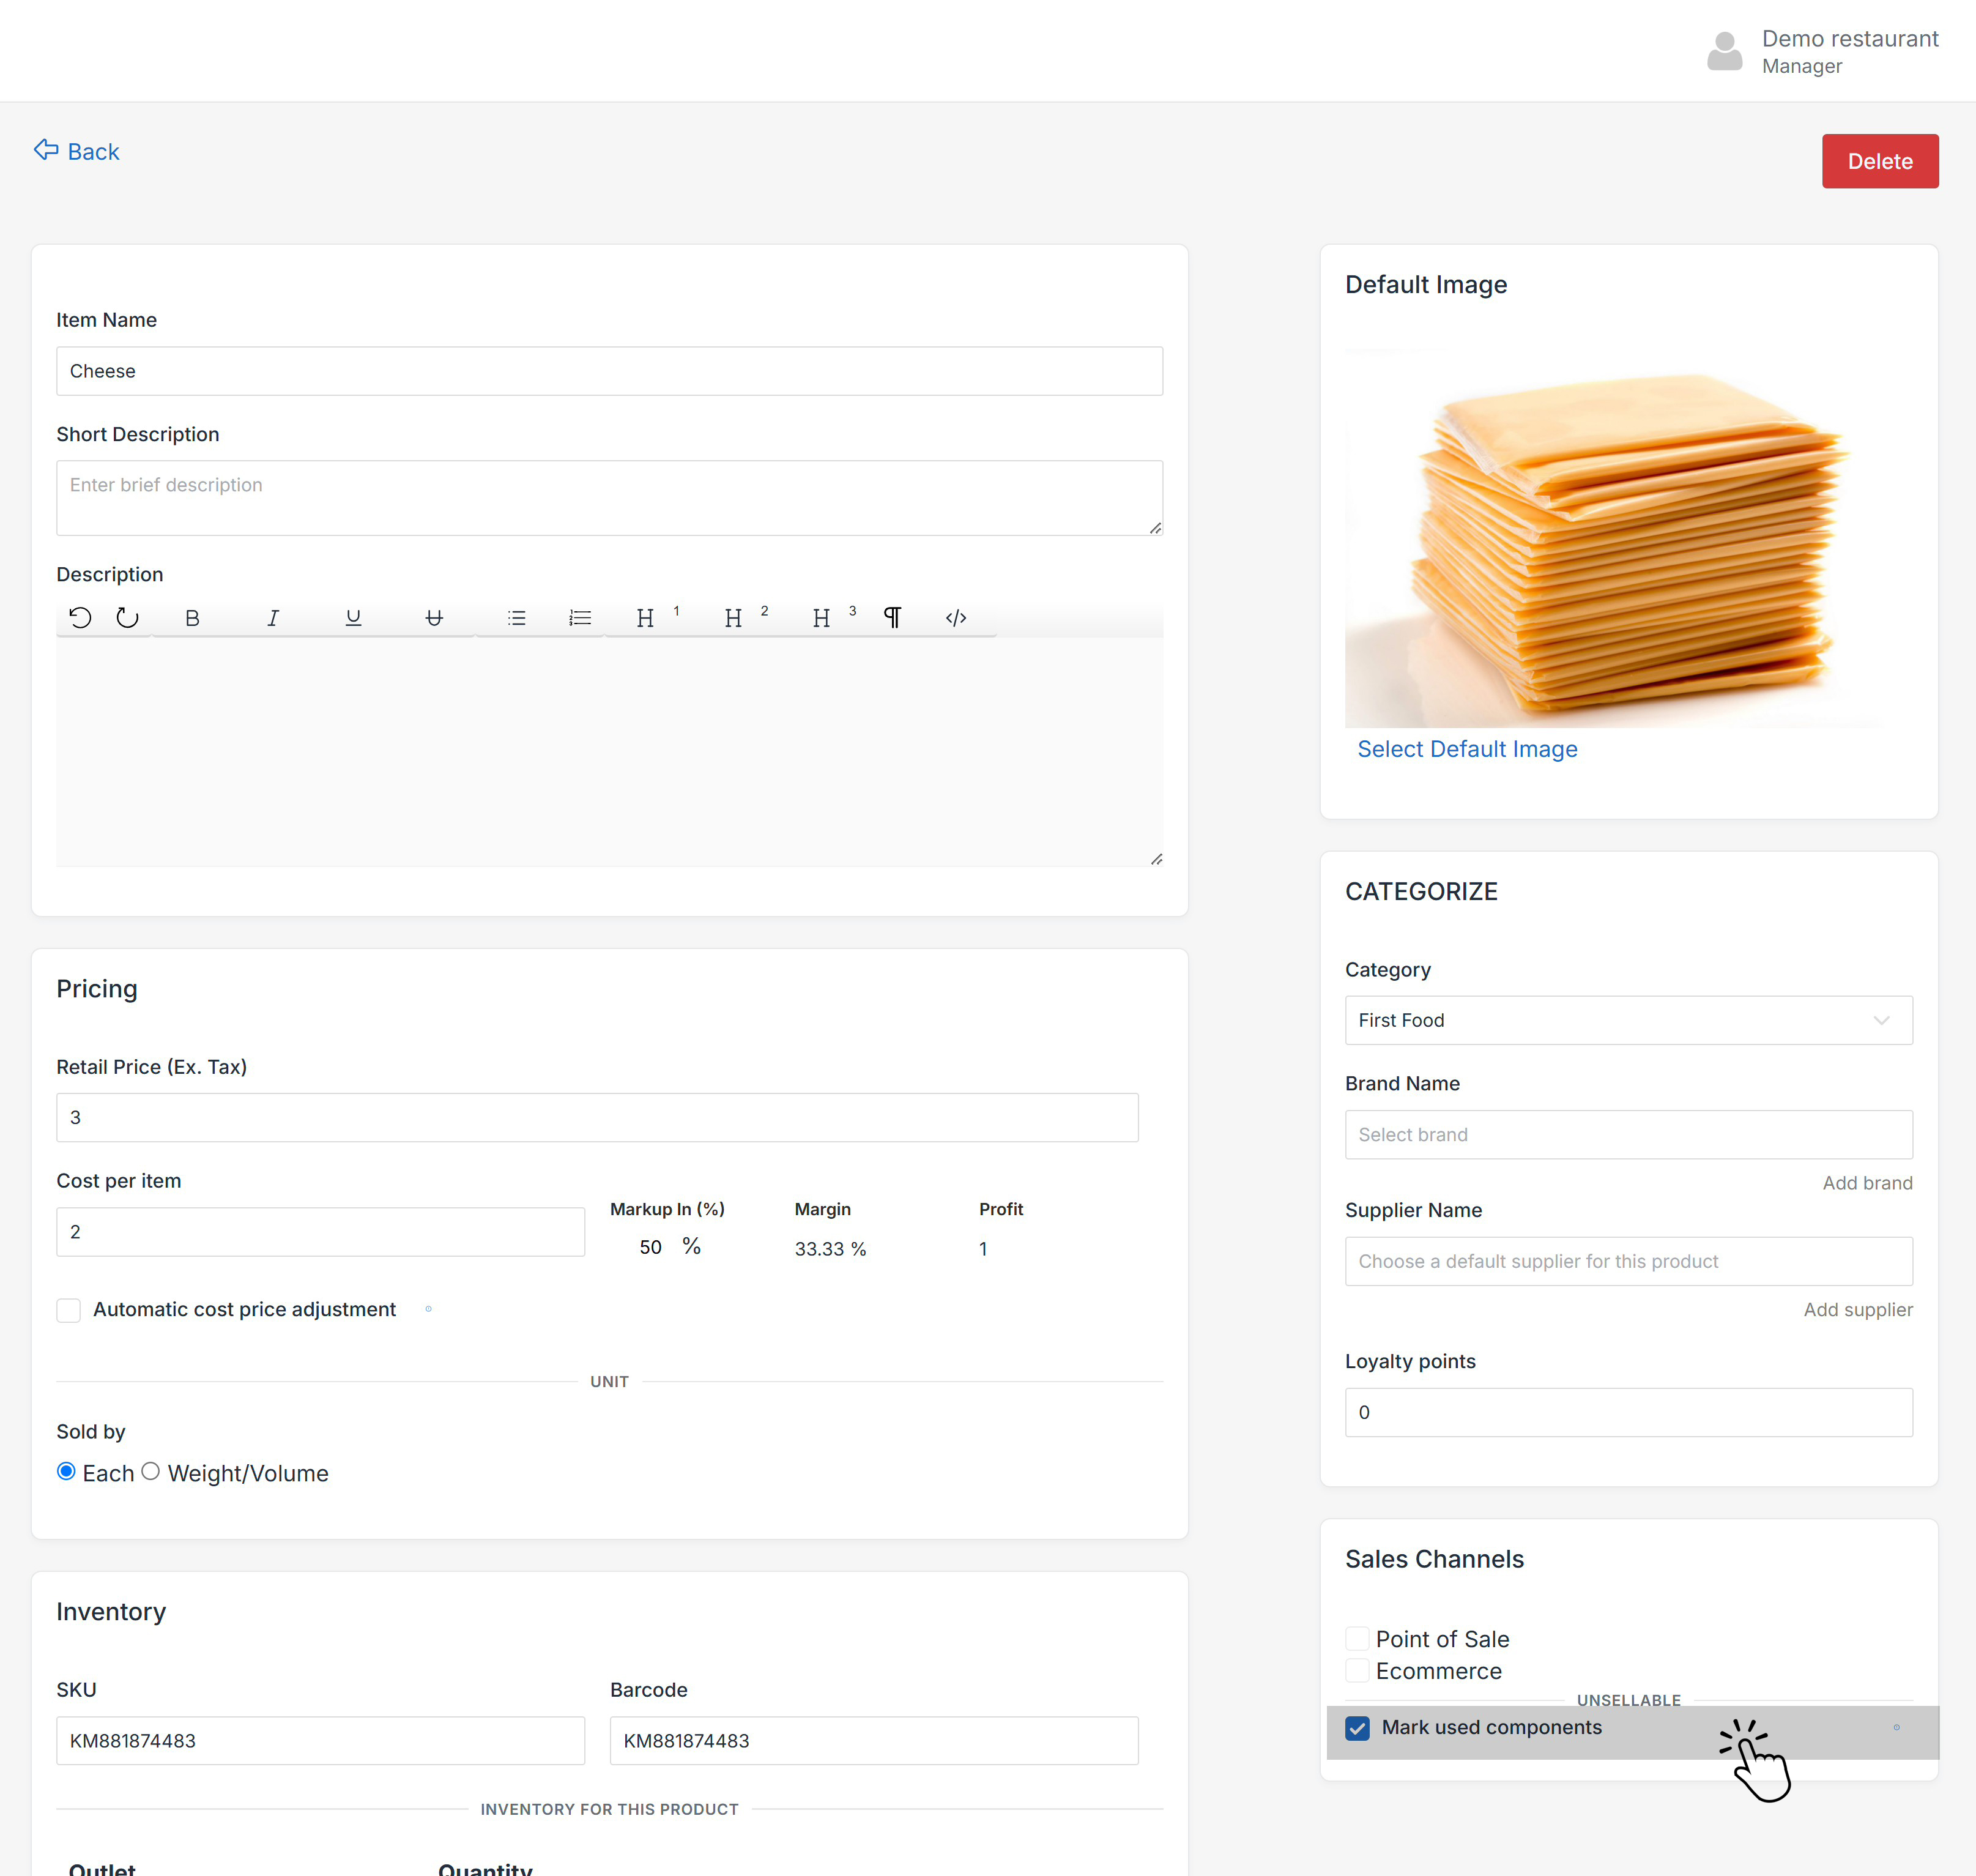
You can create components such as cheese, bacon, ham, fried eggs, grilled mushrooms, and other ingredients required for your restaurant menu.
Step 3: How to Attach Components and Add-ons to a Menu Item
After creating the component items, attach them to the relevant menu item. For example, you can configure a Classic Burger with its recipe ingredients and optional extras.
- Open the menu item you want to configure, such as Classic Burger, in the Backoffice.
- Under Composite Item, add the ingredients used to prepare the product, such as beef patty, lettuce, tomato, ketchup, mustard, and pickles.
- Set the appropriate quantity and unit for each component.
- Under Add-Ons, add optional extras that customers can choose, such as bacon, ham, fried egg, grilled mushrooms, or cheese.
- The selling price of each add-on is automatically populated from the component item's price. Save the menu item after adding the required add-ons.
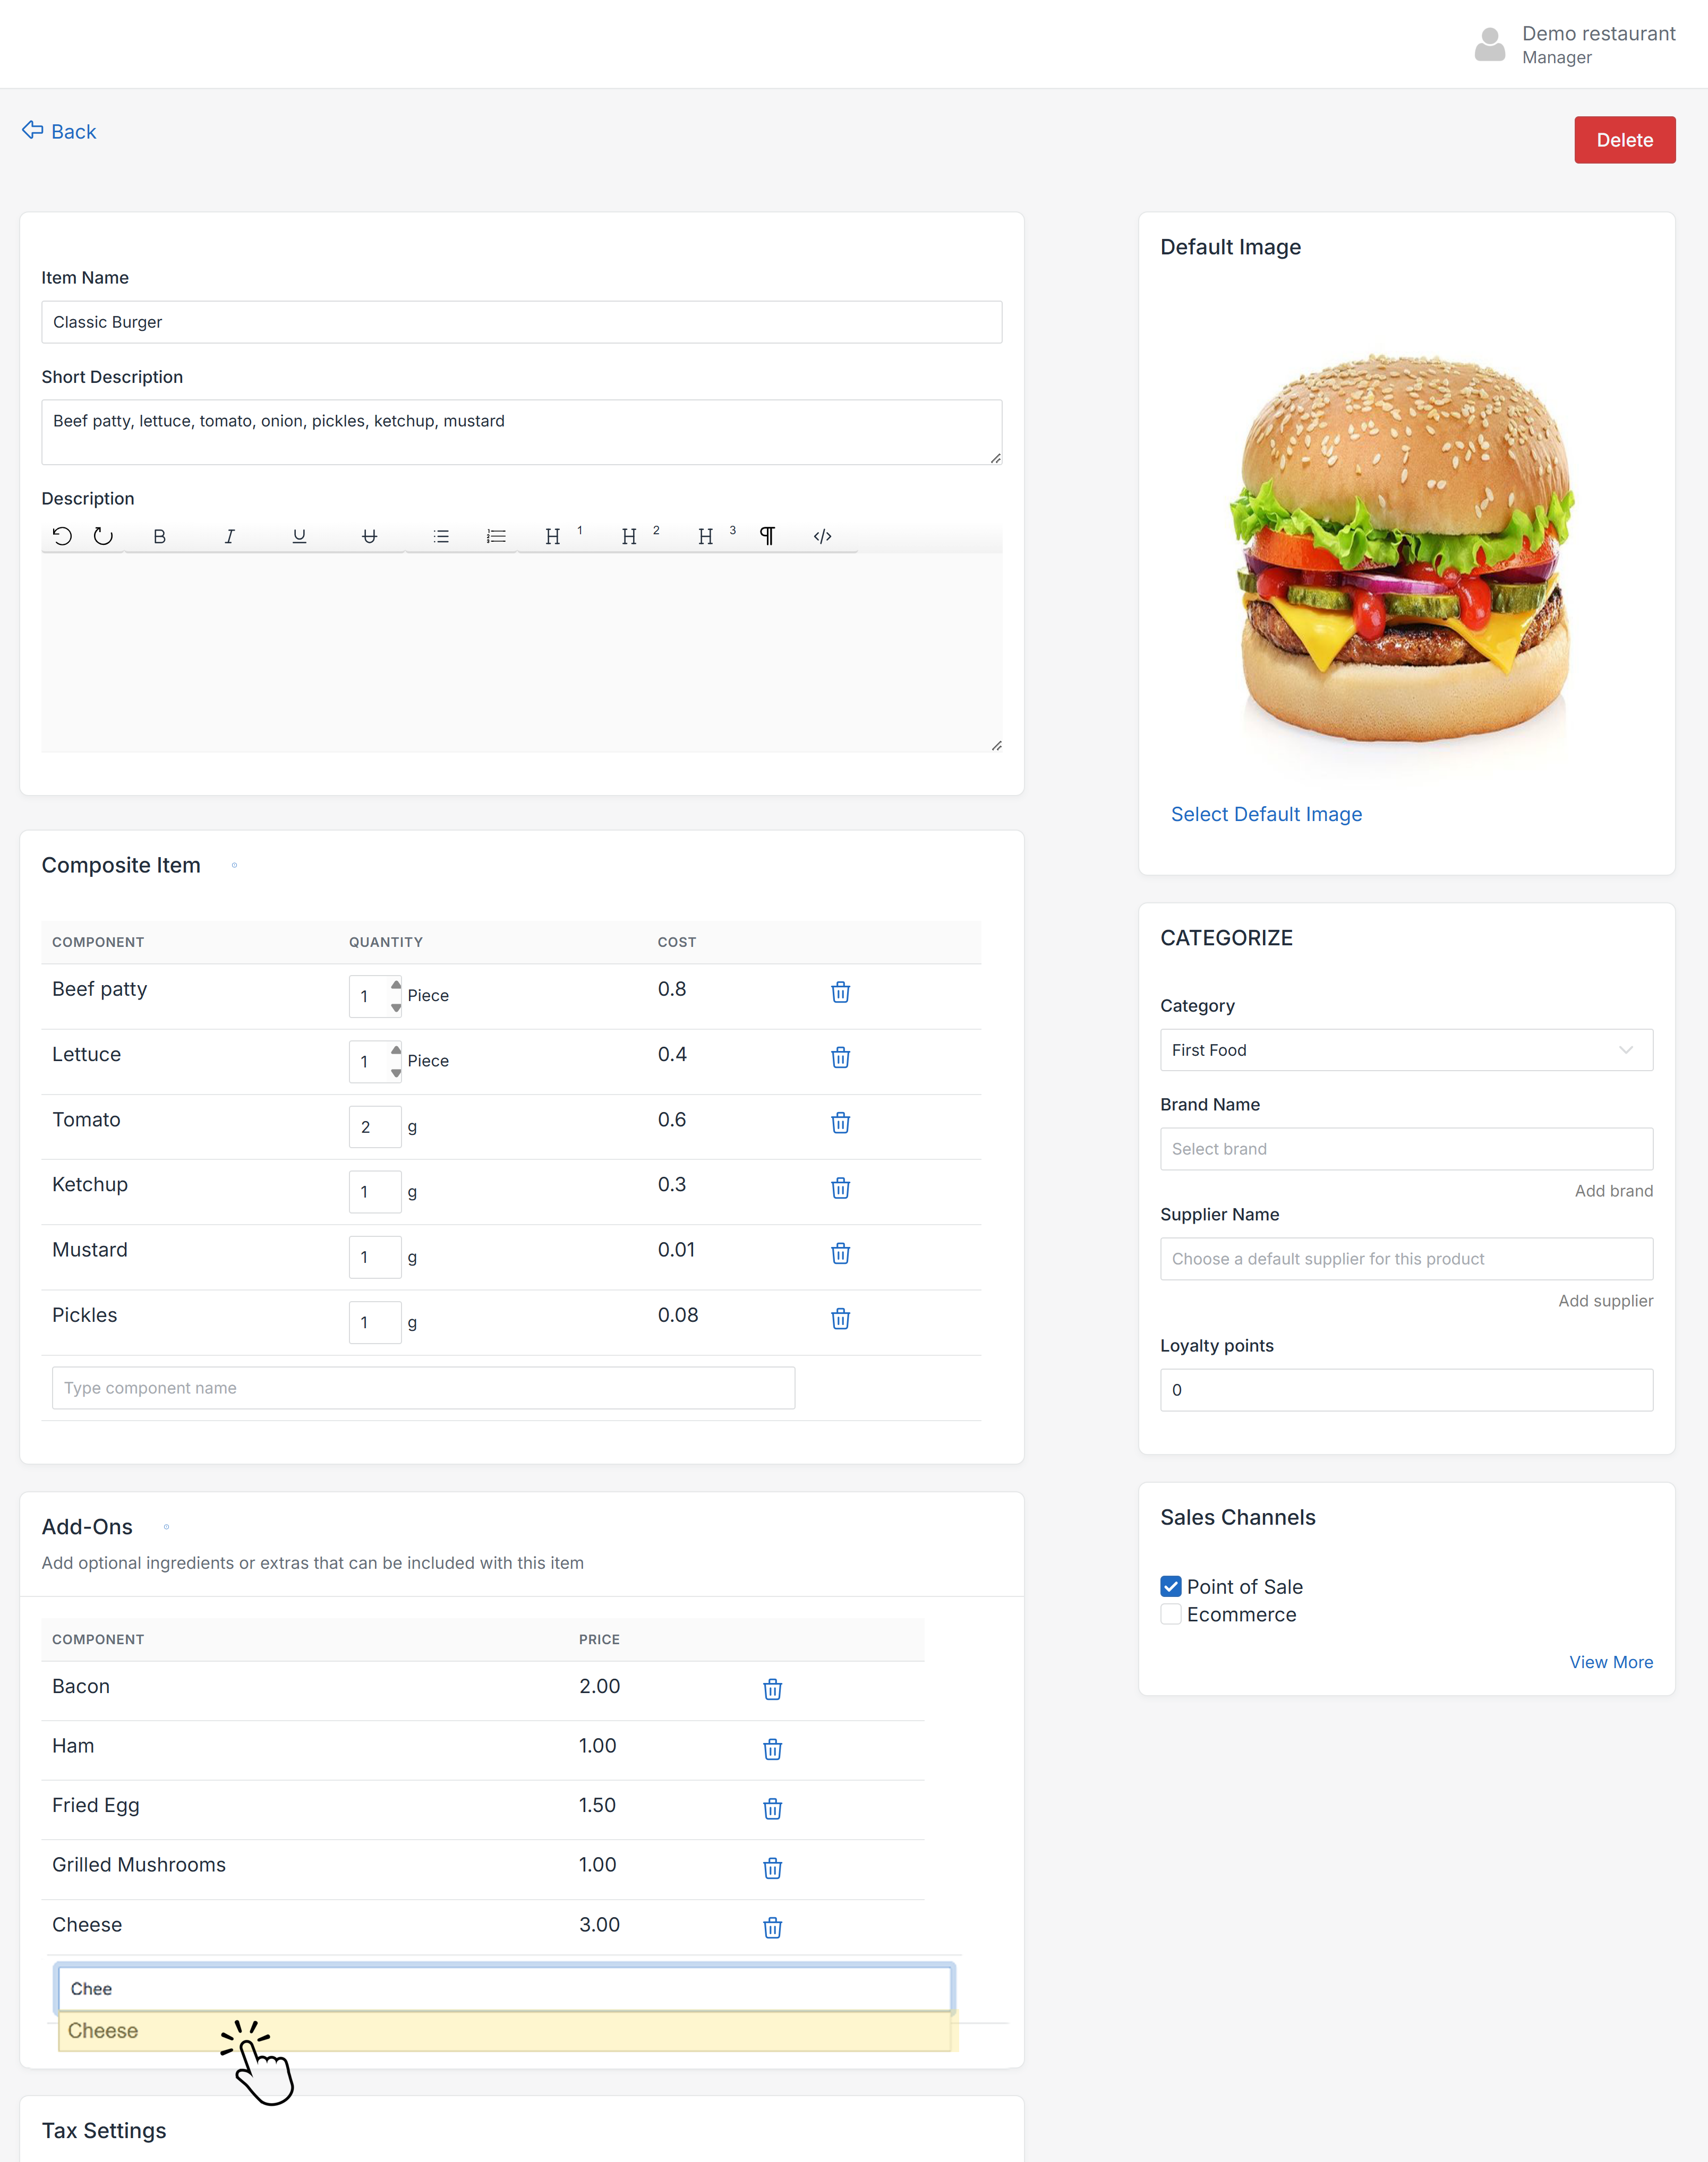
Composite Item vs. Add-Ons
- Composite Item: Used to define the ingredients that make up the product, including their quantities and units.
- Add-Ons: Used to configure optional extras that can be selected when adding the product to an order, along with their selling prices.
Step 4: Add Add-ons When Creating a Restaurant Order
Once the add-ons have been configured in the Backoffice, staff can select them while creating a restaurant order in Nexchar Mobile POS.
- Open Menu > Orders in Mobile POS.
- Start a new order and add the required menu items.
- Tap the three-dot menu beside the item you want to customize.
- Select Add add-on and choose the required extras.
- Continue to order review to check the selected add-ons and prices before saving the order.
Note: Add-ons must be configured in the Backoffice before they can be selected during order creation.
🛒 Step 5: Create a New Order

From the Mobile POS main screen, tap Menu > Orders.
On the Orders screen, tap the ➕ (plus) to start a new order.
🍔 Step 6: Add Items and Add-ons

Tap the green cart icon next to any item to add it to the order.
To customize an item, tap the three-dot menu on the right and choose:
Remove item from cart
Update quantity
Add add-on
Add-ons (like extra toppings or sides) must be configured beforehand in the Backoffice.
Step 7: Proceed to Order Review

Once all items and add-ons have been added, tap the Next button at the bottom of the screen to proceed.
This will take you to the Order Details page.
Step 4: Review Order

Add Table Info, Delivery Info, or Notes (Optional)
Access via 3-dot menu (top-right):
🍽️ Table Info: Enter table number
🚚 Delivery Type: Choose from:
Dine-in | Takeaway | Delivery
Curbside | 3rd-Party Delivery
📝 Internal Notes: Special instructions for kitchen
💾 Step 8: Save or Print the Order
Review the full order details, including quantities, add-ons, and prices.
Tap Save order to save the offline order.
Tap Save & print ticket to print an order slip for the kitchen.