🖨️ How to Print Barcode from Backoffice
This guide will help you print barcode labels directly from the Nexchar Backoffice. It walks you through configuring your label printer and printing high-quality barcodes on different label sizes.
🧾 Step 1: Configure Your Label Printer
Before printing from the backoffice, ensure your label printer is properly installed and set up.
Example Printer Used: Gprinter GP-3120TUC
⚠️ You can follow similar steps for any compatible thermal label printer (e.g., Zebra, XPrinter, Rongta, etc.)
Instructions:
Go to Control Panel or Bluetooth & Devices → Printers & Scanners.
Click your label printer from the list.
Open Printing preferences.
In the Page Setup tab:
Set the paper size (e.g.,
50mm x 25mm).Set Orientation to Landscape.
Click Apply.
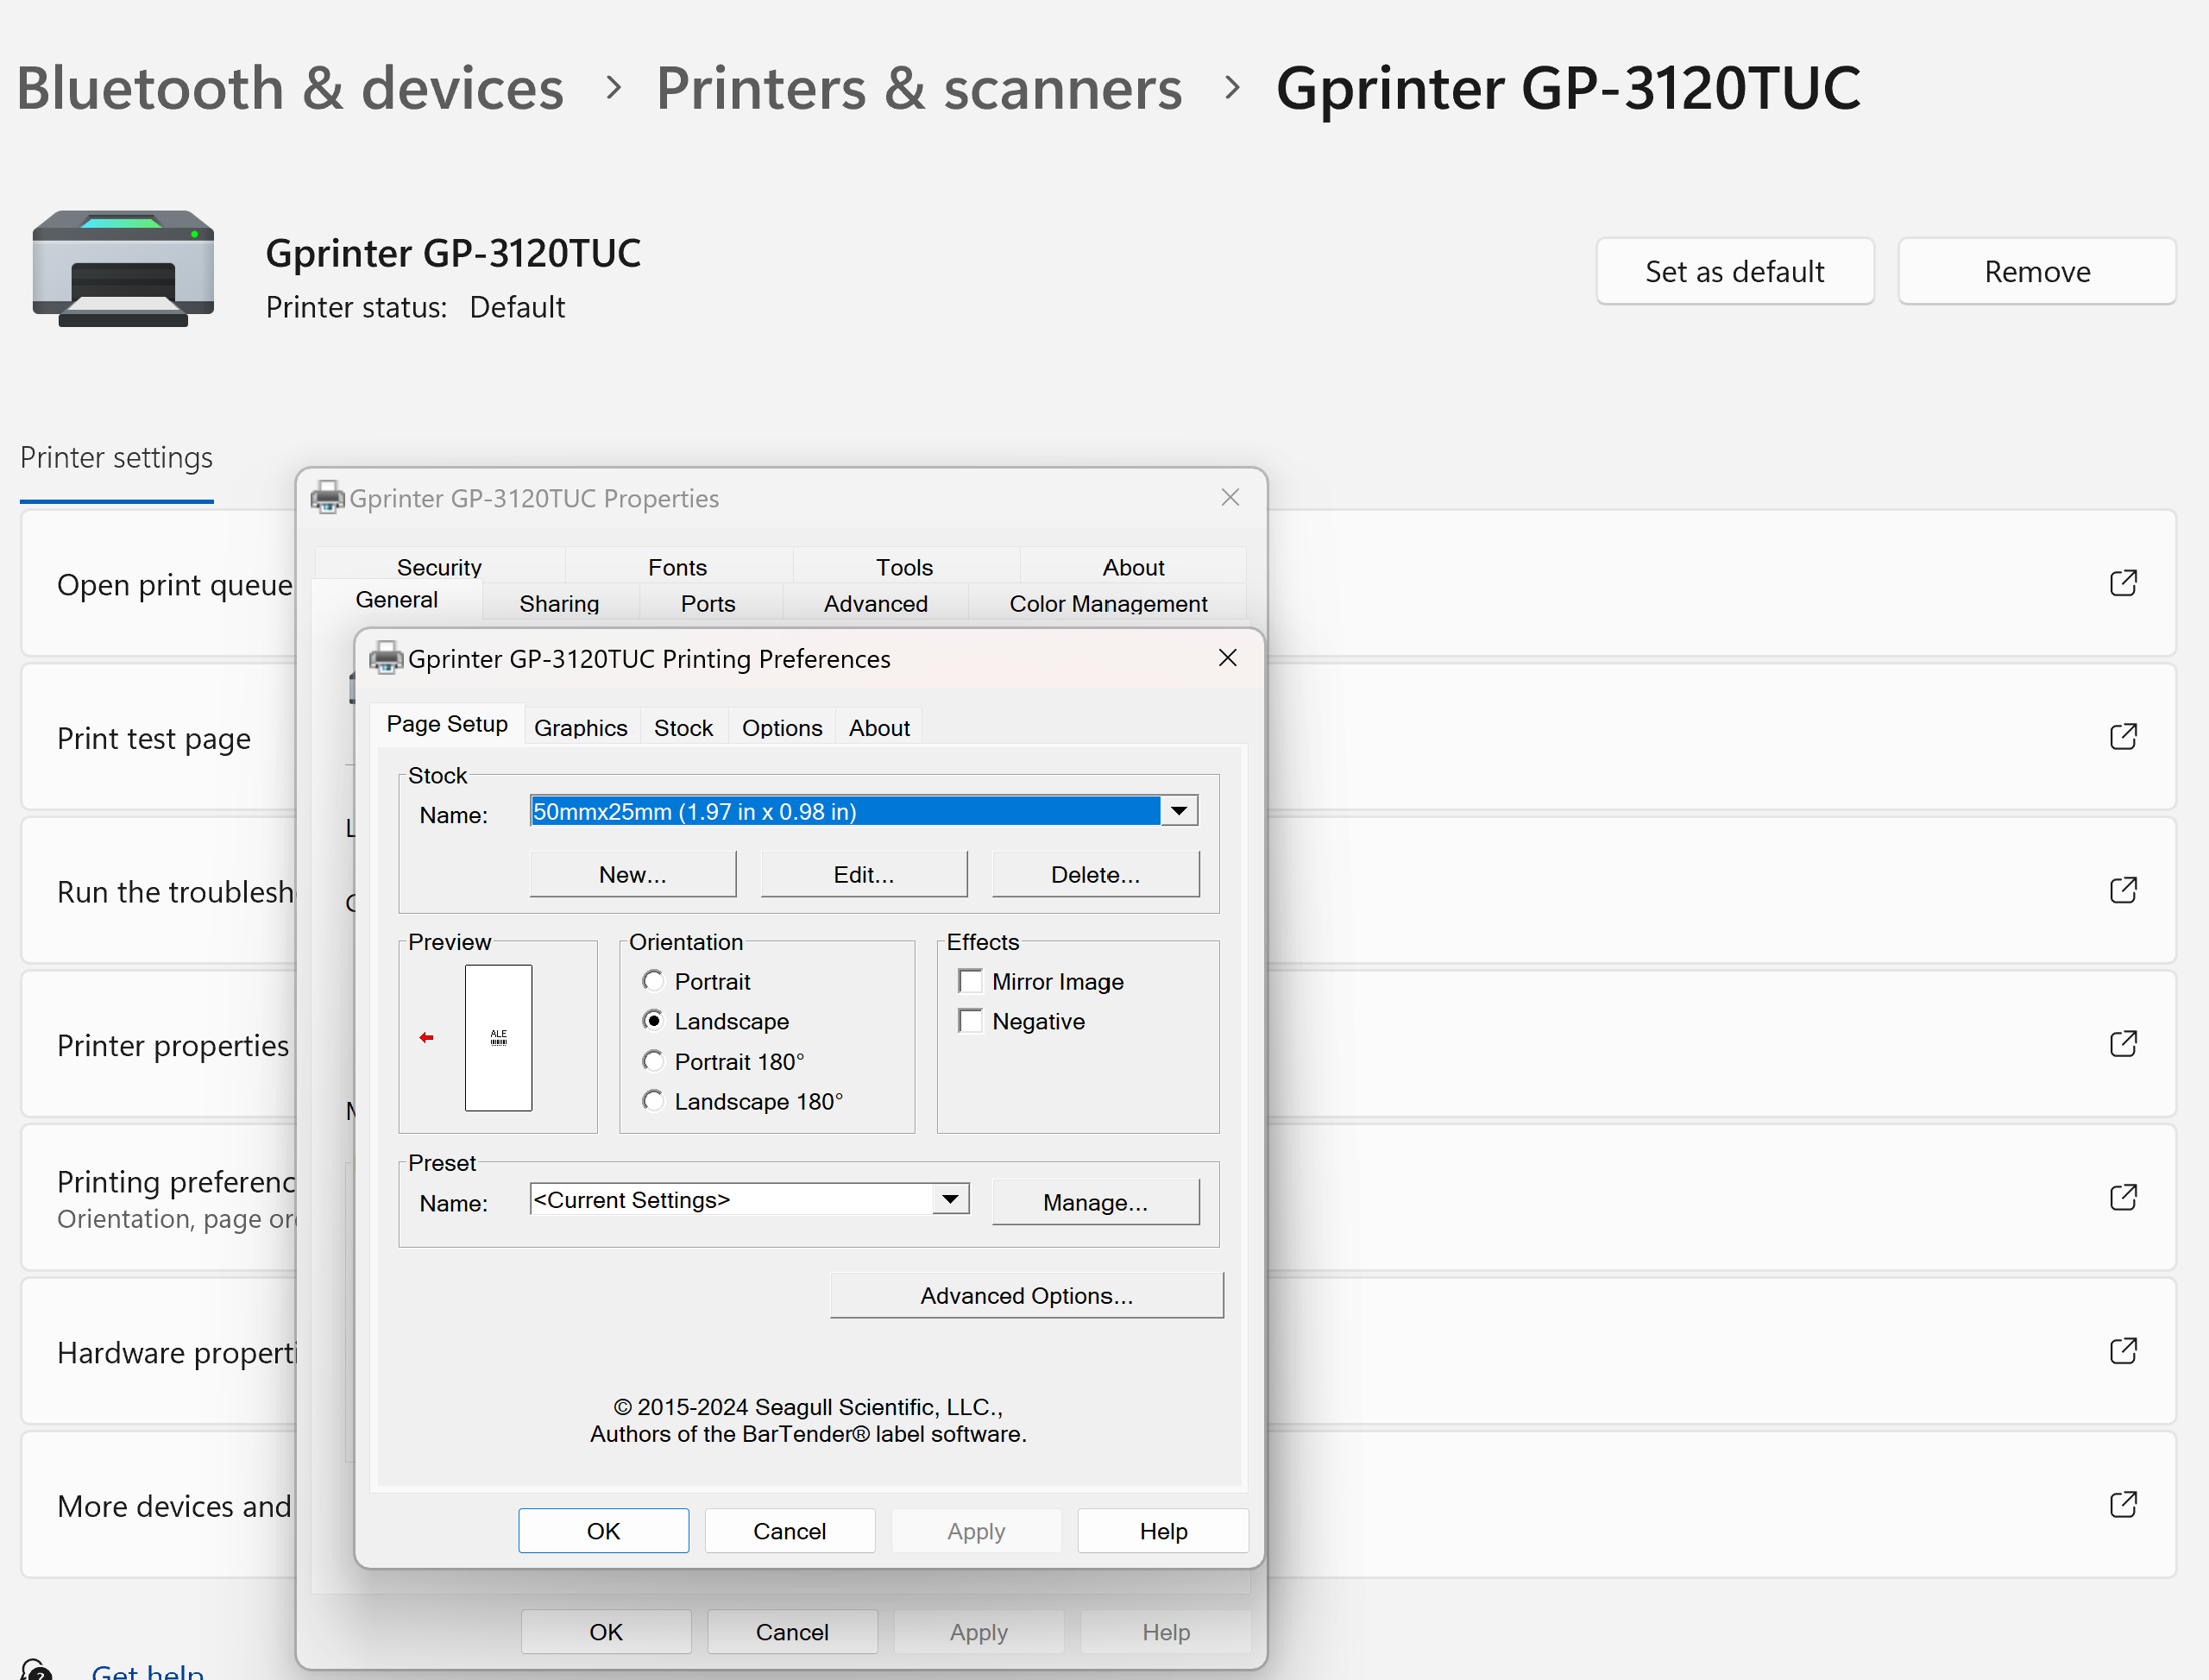
📸 Example of Printer Driver Setup:
🧑💻 Step 2: Generate and Print Barcode from Backoffice
1. Navigate to the Item List Page
Go to the Backoffice.
Click on Items from the left sidebar menu.
On the Item List page, locate the item for which you want to print the barcode.
2. Choose Label Size
On the barcode print page in your Nexchar Backoffice:
Select a label size from the dropdown:
57mm × 25mm
50mm × 30mm
40mm × 30mm
3. Preview the Barcode
The barcode will include:
Product Name
Product Price
Product Code (embedded in the barcode)
4. Click Print Button
Use the dedicated Print button on the barcode page — it’s designed to only print the barcode label content.
5. Print Dialog Settings
In the browser print dialog:
Paper size: Match your selected size (e.g.,
50mm x 25mm)Layout: Set to Landscape
Margins: Set to None
Pages per sheet: Set to 1
Scale: Keep as Default
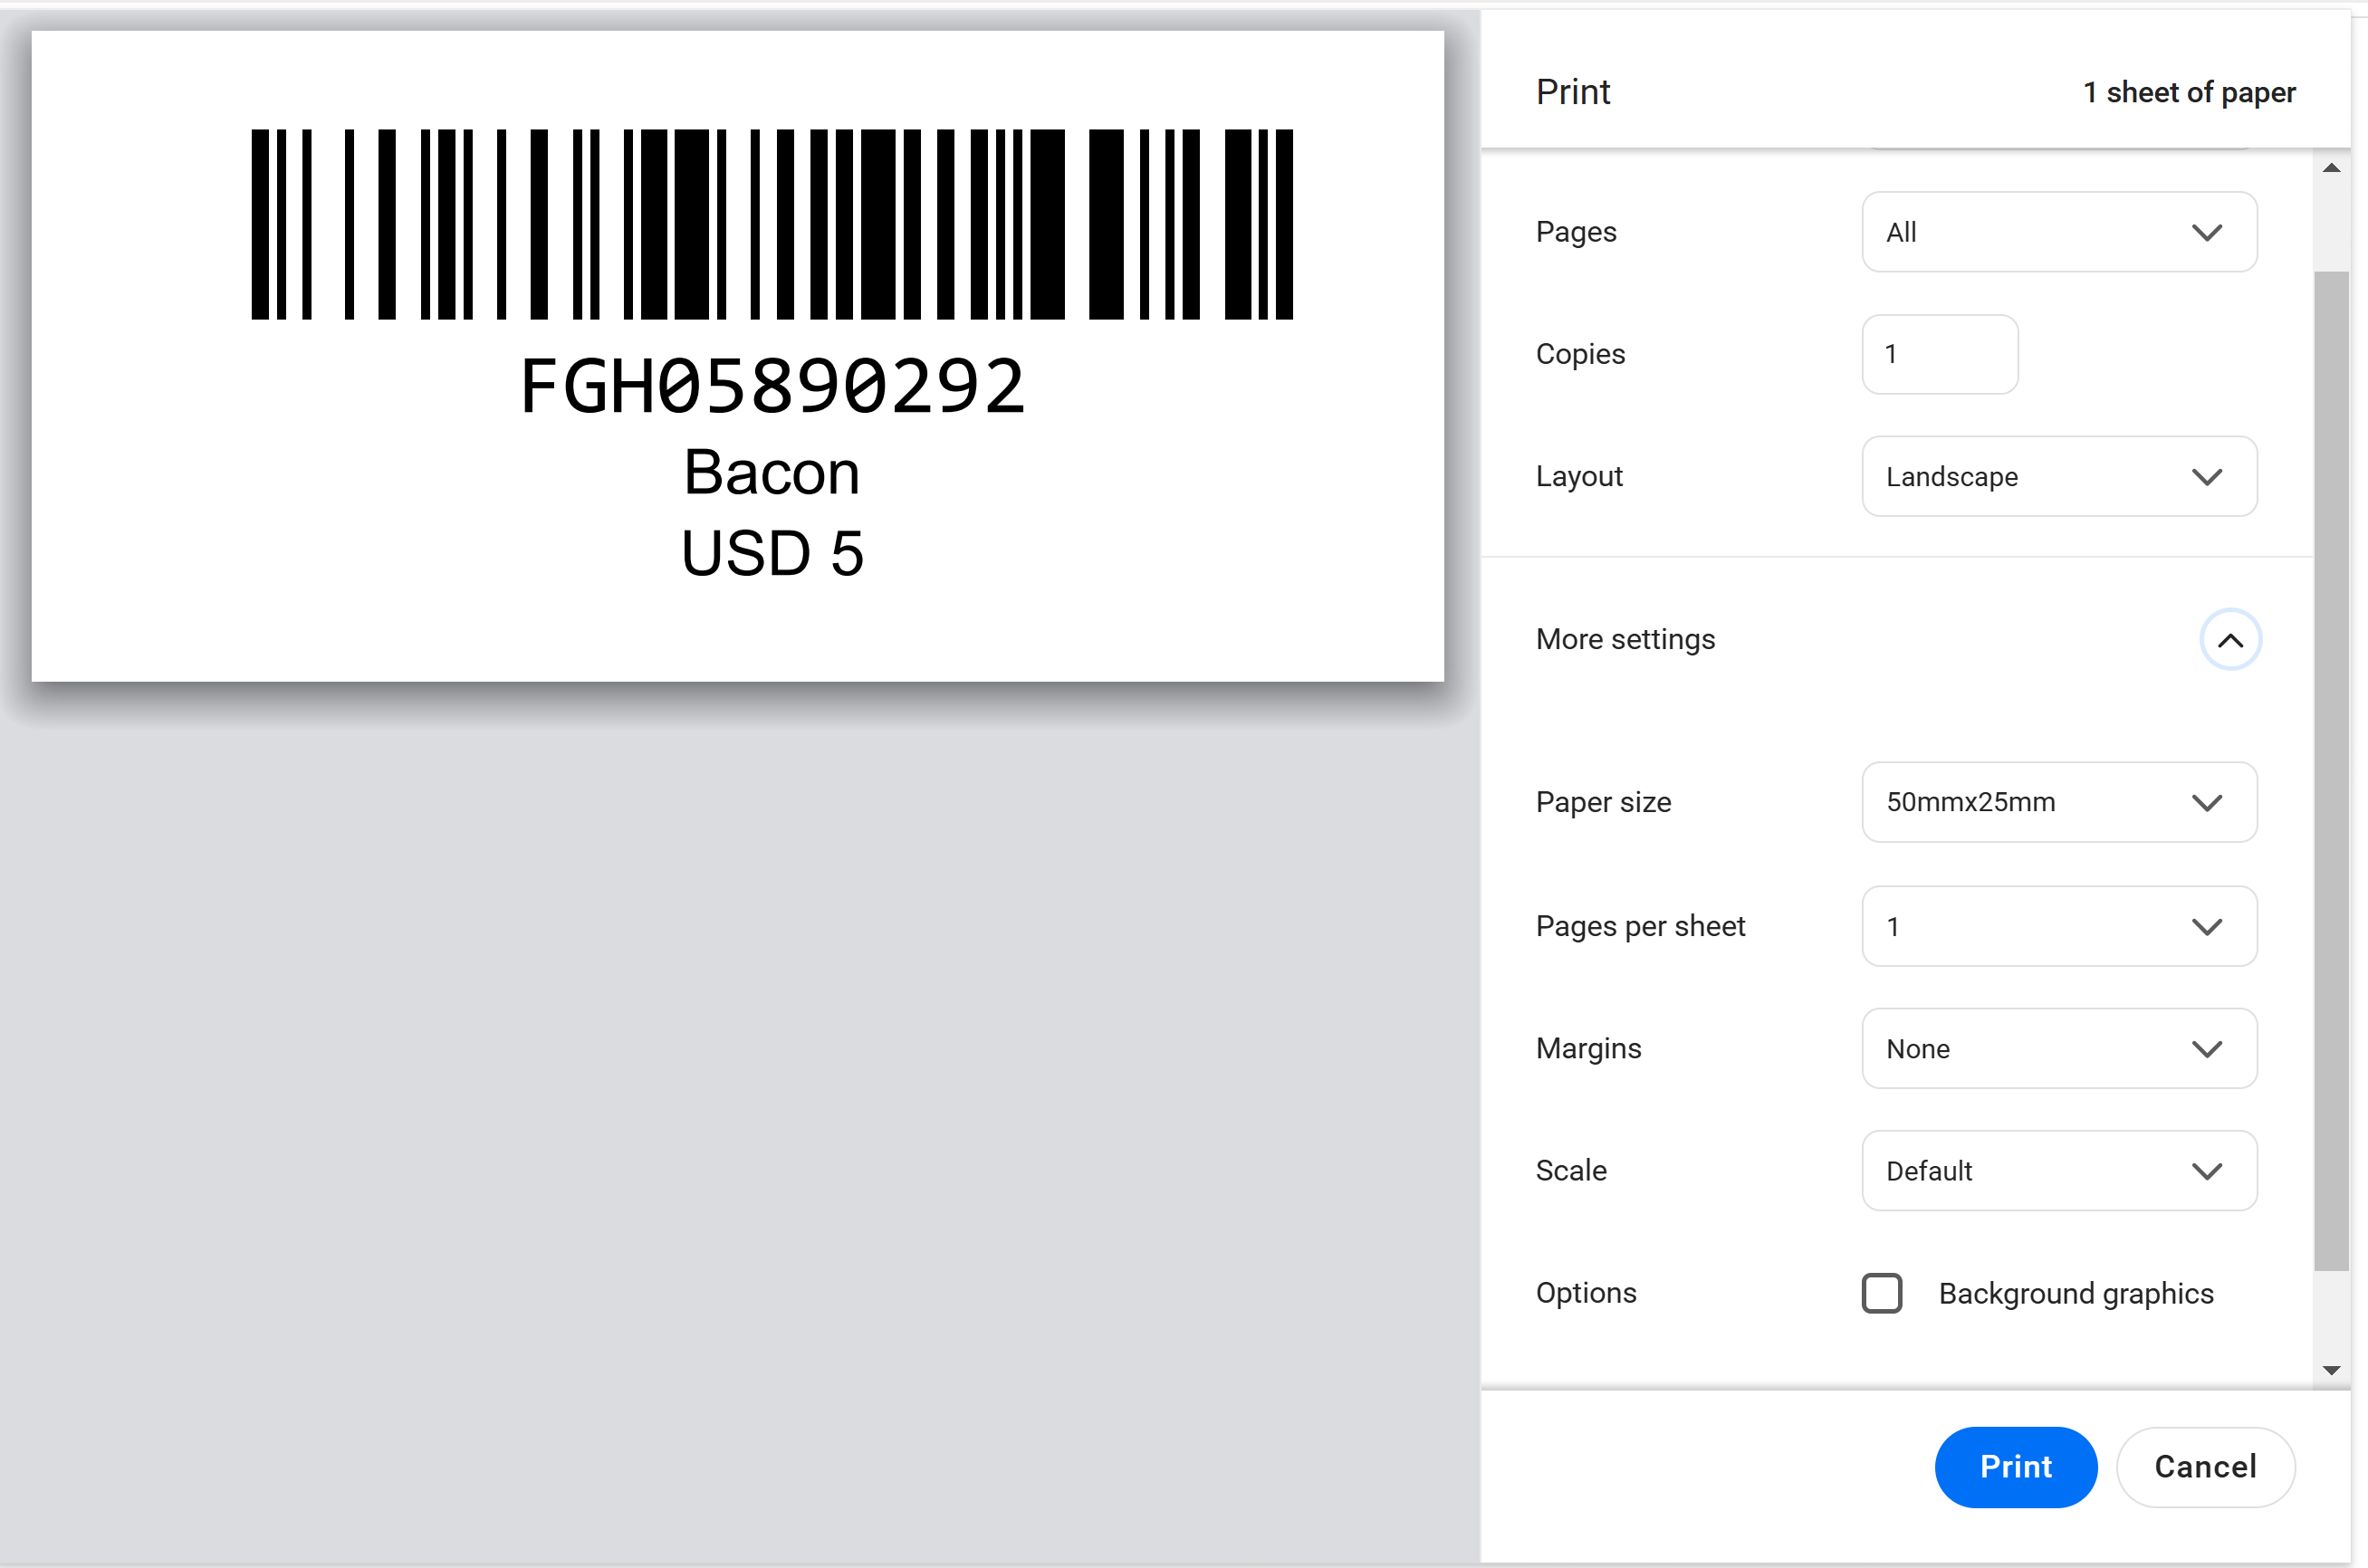
📸 Example Print Preview:
📝 Tips for Best Results
Always use the Print button on the barcode page (don’t print from the browser menu).
Make sure the label size is correctly set both in the printer settings and browser print dialog.
If barcodes appear blurry or misaligned, double-check margin and scaling settings.
✅ Supported Label Sizes
| Label Name | Size (W x H) | |
|---|---|---|
| 57x25mm | 57mm x 25mm | |
| 50x30mm | 50mm x 30mm | |
| 40x30mm | 40mm x 30mm |
If you face any issues, feel free to contact Nexchar Support with your printer model and label size information.